Total lawn elimination using no-till beds
I don’t like mowing a yard, especially when the yard is on a farm. It irritates me to push a noisy piece of machinery over a piece of land that yields no food for me or the others living here. The roaming rooster and guineas glean a little here and there, but there really are not impressed with the selection at this particular salad bar. A yard is great for a picnic, but I would prefer a pasture for a picnic any day.
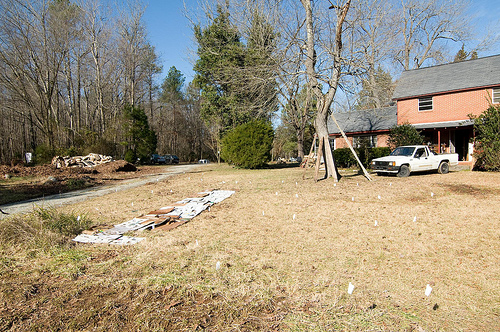
I am vowing that this coming year the mowing will be minimized. Going in are perennial beds, hugelkultur mounds, insectory plants by the hundreds and a kitchen garden for fun. The front yard outside of mine and Kristin’s door is the first to fall. Step one is to kill the grass or otherwise remove it. Well, actually step one is to figure out where the beds will go and do some measuring and flagging.
A few years ago I attended a workshop at the annual CFSA conference presented by Susana from Salamander Springs Farm. The workshop was all about building no-till beds on top of grass. I finally found the notes in one of the piles of notebooks that I have only recently brought together into one pile. The notes spell out a no-till “Layer Cake” garden bed recipe:
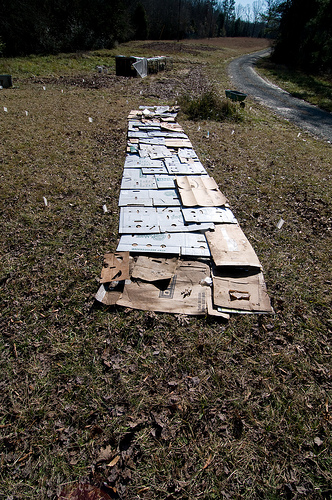
Step one – “The Plate” consists of large sheets of cardboard laid over existing pasture or lawn.
Step two – “The Cake” consists of several inches of manure or compost.
Step three – “The Frosting” consists of mulch such as leaves, old hay, shredded paper and straw.
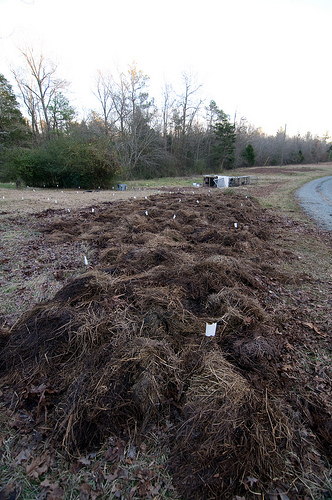
Step four – “The Baking” consists of letting it all settle and rot for three to four months.
Step five – “The Eating” consists of pulling the mulch back to put in plants and replenishing the mulch as the plants grow.
For our cardboard needs we almost always head to Siler City. The dollar stores’ Dumpsters are usually a nice jackpot for all sizes of box, not necessarily a requirement to fit most mulching needs. For larger jobs we would hit furniture and appliance stores. The boxes are bigger and thicker providing more grass and weed killing power. For uniformity of boxes, the local ABC Liquor store would be perfect. Most folks hit them up for packing boxes. For wax boxes, hit the grocery… Since this particular project was just a piece of a front yard, the dollar store cardboard works well. The only problem is the tape. There is a lot of tape to remove and dispose of.
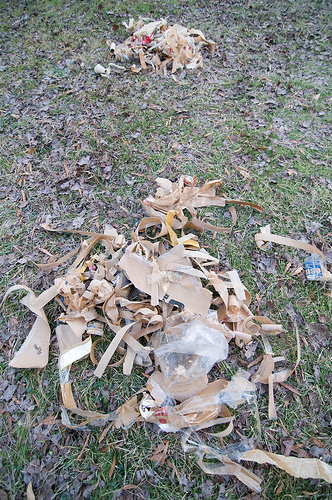
While peeling off tape, you get to see where all the crap products come from and come through. Most of the importers seem to be in New York City of New Jersey. The origins are India, China, Korea, Vietnam. None of the boxes were made from recycled material (no notices on the boxes), so I will probably be mulching with cardboard descended directly from trees, most likely trees from Canada. That is a long way to go in order to get into my front yard. The boxes also have loads of staples, fabric tape and heavy duty packing tape holding everything together.
The value of the boxes and its associated connectors is probably higher than the value of the stuff inside the box. I know the value of what I am about to grow on and through those boxes is higher than the box plus the stuff inside. And then some – mostly because so much comes from the cardboard. Earthworms tunnel under and through it; pill bugs, beetles and earwigs make their home in the crevices between the layers; fungal mycelia run like branching rivers throughout the whole bit. All of this activity leads to the decomposition of the still useful organic matter and carbon that is nestled within the cardboard.
What would have taken years to happen with the use of a new log, the loggers, grinders, pulpers, pressers, importers and exporters have made into a readily available haven for all sorts of micro and macro interactions. But the folks at the end of the box-chain would have just thrown it away or possibly recycled it into more cardboard that would eventually be thrown away (nothing against recycling cardboard) whereas we at Circle Acres have really recycled the box and returned it to its rightful place – rotting on the ground and being digested by those who can do such a thing.
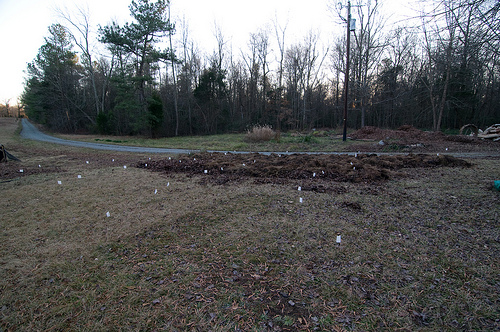
The only drawback to this system is that it takes a really long time to build. For one person, by hand, estimate at least two hours to go twenty five feet. Then of course there is the “baking” part, but after three or four months the area should be grass and weed free. It will also be a nutritious place to start off new Spring plants for Summer harvest.
December 28, 2009 at 3:26 pm
another great post! Love the easy to remember layer cake idea & that those boxes are doing so much more than they would have. Can’t wait to see how it looks after all the baking & eating.
Hope you are all doing great. Miss you in Wilmington, but this is such a wonderful thing you are doing out there!
January 23, 2010 at 6:47 pm
No-till gardening is the best! I did a garden (20′x30′) in our backyard last year using this method and it’s worked wonderfully! Instead of cardboard though I used a few layers of wet newspaper and then piled about 6-8″ of compost on top that we got from the city on the cheap. I planted in the spring and didn’t have any problems with grass throughout the growing season. And, then all I am planning to do this year is add some leaves on top and do a little hand tilling and hopefully it’ll be good to go. I’ve also seen this method of gardening called “lasagna” gardening – there’s a decent book on it, but it’s quite repetitive. Digging the website, Trace!
April 9, 2010 at 8:41 pm
you’re on the right track! I lived in an area that was all heavy clay — nothing but acid-loving weeds grew. Over the winter as produce disappeared from the freezer, I would restock with bagged vegetable clippings, fruit cores etc. – anything edible and not meat or fat. In the spring and during the summer I would layer these “saved goodies” between the cardboard, raked-up dead grass, newly-pulled green grass, newspaper (black ink only), and weeds pulled from existing garden beds, whatever I could find. Do not laugh…I even piled in deer and moose droppings. Throughout all of these layers I sprinkled generously the soil from one bed left unplanted for this purpose along with the soil mulch found in the woods by uprooted trees. Within a few years I had several beds all producing abundantly. Every fall I would add spoilt produce collected from wherever I could find some and made sure earthworms were present to do their work over the winter. Beautiful soil!