Quart of sauerkraut

making sauerkraut

Making sauerkraut

Fermentation is something that I only recently began to appreciate and learn about. Since picking up the books Wild Fermentation and Preserving Food Without Freezing or Canning, I have been taking on fermentation projects a few times a week. The kitchen is littered with quart mason jars full of various colors and smells, the fridge is home to some finished products and ongoing ferments (like sourdough starter) and our small basement holds a crock of developing sauerkraut.

If you have never had sauerkraut, I’ll ask you to consider giving it a try. The tangy, salty goodness is perfect on a tomato sandwich, on a salad instead of salad dressing or simply by itself. I have eaten the store bought variety from Bubbies right out of the jar, but it wasn’t until I pulled out a jar full of the stuff that I made that I truly appreciated the taste and amazed myself by how much of it I could eat. And eating it raw (unpasteurized) maintains the beneficial aspects of lacto-fermentation such as good bacteria, high quantities of vitamin C and keeping certain acids available to aid in digestion.

I started the process with a few heads of green cabbage from Black River Organic Farm (45 miles), a cabbage cutter, some salt and a Harsch fermenting crock.

1 – Weigh out the cabbage, either at the store when you buy it or at home if you have a scale. For every five pounds of cabbage you will need three tablespoons of salt.

2 – Measure out the salt you will need and place it in a bowl.

3 – Halve the cabbages and shred using a knife, a grater or whatever you have available.

I used a heavy duty cabbage grater and it made the process go very quickly.

4 – As you grate the cabbage, add it to the crock. As you add a layer, sprinkle the cabbage with salt. The salt will pull water out of the cabbage.

5 – Continue layering the cabbage and salt, pressing down occasionally with your fist or a utensil to press water out of the cabbage. Don’t fill the crock all the way to the top. I filled about 3/4 of the way up and compressed the cabbage further down.

6 – Once you have all the cabbage and salt in the crock, you will need to get enough brine generated to cover the cabbage and the weight (a plate or the stones that come with a Harsch crock) needed to hold the cabbage under the level of the brine. You can use whatever you have handy to do the pressing. I just beat the cabbage with my fist until I had plenty of brine and the cabbage was tight and compressed in the crock.

7 – Place a whole cabbage leaf over the contents to keep any bits of cabbage from floating in the brine.

8 – Add a weight to the top of the cabbage such as a plate or, if using a Harsch crock, add the two stones. Make sure that the brine covers the weight. If you need more brine, add salt water in a ratio of 1 tablespoon salt to 1 cup of water.

9 – If using an open crock, cover it with a towel secured by rubber bands. This is to keep dust and creatures out. If using a Harsch crock, put the cover down in the groove and fill the groove with water. Be sure to check on the crock periodically to refill the water.

10 – With a Harsch crock there is no daily maintenance required, only minimal inspection to check on the water in the groove. With an open crock you will need to scoop out any film or mold that forms on the surface. If mold forms be sure to wash the plate. Also be sure to check the brine level in an open crock and add salt water if needed.

11 – In an open crock in warm weather you can start removing sauerkraut after a week or so. With a Harsch crock leave it to ferment for about 4 weeks then take a sample. Mine was good and tangy after 4 weeks. You can scoop everything out at once or just take a bit at a time. The sauerkraut will get better as it continues to ferment. I put my crock away after filling a quart jar with the contents. I’ll take out some more next week and the week after.
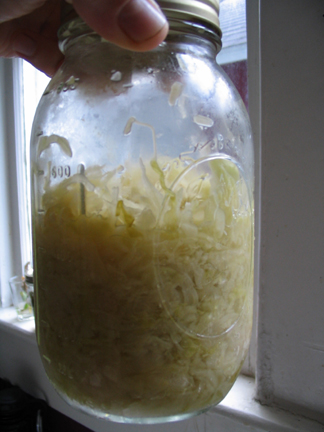
Quart of sauerkraut

This process is based on the recipe in Wild Fermentation with some tips from my experience and some additional instructions for using the Harsch crock.

This entry was posted in fermentation, food preservation, recipes. Bookmark the permalink.

10 Responses to Making sauerkraut

  1. marye says:

    you know, that is one thing I have never made..sounds like I should…we could call it science!

  2. Teresa says:

    Great write up! I love sauerkraut and started making it 2 years ago. The thing I love best about it aside from the taste, is that you don’t have to can it, as you mentioned. I’ll be doing salted green beans this week in basically the same way. These taste fabulous and also don’t need canning. I will look into the books you mentioned, they sound interesting!

  3. leissia says:

    home-made sauerkraut.. fond memories of the salad made by the mennonite/amish in lancaster county, pa. it had diced green pepper, diced apples, raisins, and i think a tad of chopped onion. heavenly stuff. those were the days of the ‘big kitchen’.. putting up local and garden goodies for the full year. fermenting pickles, green tomatoes, hot red peppers doing their strange ferment in jars lined up on the counter.. so pretty and so tasty! fermenting is a wonderful “lost” food-art.

  4. Trace says:

    This sauerkraut keeps getting better and better. I have been putting it on everything!

  5. Amy says:

    The whole Harsch crock makes this process sound much easier. I first read about home-made sauerkraut in The 100 Mile Diet and the process of skimming mold from the top really grossed me out. However, I think I’d try it your way without the open crock.

  6. Trace says:

    The Harsch crock is a great investment in food preservation. Get the biggest one you can afford.

  7. Dan Beougher says:

    I was taught how to make kraut by my German mother and have teaching a class on macrofermentation for a number of years. The Harsch crock is the best and easiest way to effortlessly ferment kraut, or as I did last summer, a crock full of pickled veggies. It’s a fantastic device well worth the price.

  8. Trace says:

    The Harsch crock is an awesome way to get started with fermentation and to keep at it.

  9. Tony says:

    Would it be possible to send me the instructions I lost to my harsch crock via e-mail?

  10. Kenny says:

    Just loaded up my Harsch 10L crock last night with my first batch of kraut! I used two heads of green cabbage, one head of Napa Cabbage, and two fresh green tomatoes from my garden (got a wild hair with the tomatoes but can’t wait to try it now!) I’m excited about my first batch and can’t wait to sample it.

ginger scrap kimchi

Ginger scrap kimchi

In an effort to incorporate more “waste” into my diet, I find myself scrutinizing the scraps, trimmings and ugly produce that I throw in the compost bucket at work. Some of the items are still good on some level, with enough trimming and patience, like a shriveled piece of ginger with moldy tips or a piece of daikon in similar disarray. These two produce bits passed from my hands to the compost bucket today. I salvaged them a few minutes later, mainly because I wanted to try to make kimchi, a spicy fermentation using ginger, radish, hot peppers, onions and garlic.

The radish and ginger are two items currently out of the 100 mile range, the ginger being something that I may only find as scraps and never locally grown except by a hobbyist. So I grabbed several little pieces, stuck them in my backpack and brought them home.

In addition to saving the ginger and daikon, I bought a small cabbage (45 miles), brought it home and added it to a couple carrots from a bag that Gary – my Albert’s Organics representative – gave me out of his weekly food box, a few heads of elephant garlic (45 miles), leeks (45 miles) and jalapeno peppers (35 miles) that I already had at the house.

The process of making kimchi seems pretty straight forward, a bit like sauerkraut, but without the wait. This recipe is adapted from Wild Fermentation.

1 – Make a strong brine using 4 cups filtered water and 4 tablespoons of salt. Dissolve the salt fully in the water.

2 – Chop carrots, cabbage and radish/daikon into the brine.

3 – Weight down the vegetables with a plate to keep everything submerged in the brine.

4 – Leave the mixture for a few hours as the vegetables soften up.

5 – Make a mixture of a finger of grated ginger, a few cloves of chopped garlic, a couple hot peppers with seeds, and an onion or several small leeks. Mix and smash the ingredients, bringing out the juices.

6 – Drain the brined vegetables, saving the brine in another container. If the veggies taste gaggingly salty, give them a quick rinse with fresh water.

7 – Mix the spicy paste into the vegetables.

8 – Pack everything into a wide mouth quart jar, packing until brine comes above the top of the mixture. If the level of brine isn’t high enough to cover everything, add some of the saved brine.

9 – Insert a smaller jar into the mouth of the quart jar and press down until brine rises above mixture. Hold down with rubber bands.

10 – Cover with a cloth and rubber band the cloth to the jar. Set aside in a warm place to ferment.

11 – Check the kimchi every day. After about a week, move the kimchi to the fridge to slow fermentation and enjoy.

This entry was posted in fermentation, food preservation, recipes. Bookmark the permalink.

One Response to Ginger scrap kimchi

  1. annie says:

    This was absolutely absorbing reading – I had just been reading in a magazine last night about attempts across the country to live only on what one can grow or get close to home. Frankly, there is much more creativity in the way you cook than in buying 600 ingredients to make something fancy. Consider me an admirer and someone inspired to try to “grow my own” to the extent I can do so on a small, urban lot, and to think about the origins of the things I have to purchase.

Canning supplies and equipment

preserving knowledge

Preserving knowledge

I opened my first jar of homemade vinegar dill pickles, one of the quarts I put up a few weeks ago from the Black River Organic Farm cucumbers. The first pickle out of the jar was nice and crisp, if only a bit wobbly, probably due to the fact that I didn’t bother to put Pickle Crisp in the recipe. I really don’t care about the aesthetics right now, as long as the pickles came out okay and don’t kill me.

I made two different batches, one with regular white vinegar and the other with apple cider vinegar. The apple cider vinegar pickles might be an acquired taste just like the vinegar itself. They are a little tangier and have more of a vinegar aftertaste unlike the white vinegar pickles. Again, I don’t mind as long as they don’t kill me.

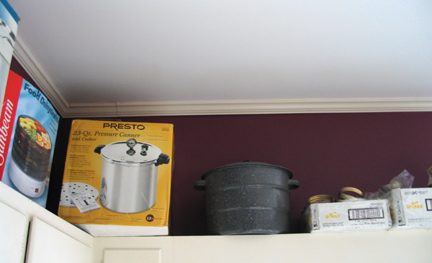
Kristin and I have had canning paraphernalia around our various houses for the past three or four years, purchased under the assumption that each summer was going to be the summer where we preserved a bunch of food. We have the regular hot water bath canner as well as a pressure canner. On top of the kitchen cupboards are boxes of various sized jars, picked up from Big Lots, yard sales and some area thrift stores.

Canning supplies and equipment

Kristin and I went to a Saturday morning canning workshop quite a few years ago and made pickled pears. We learned the process and theory behind canning with both boiling water and pressure. It seemed simple enough, although someone was holding our hands throughout. We came home and said that we would get right on it and start canning our own stuff. And then we didn’t, and the years went by.

The 100 mile diet project got me back in the mindset of preserving food by canning. This time there wouldn’t be excuses because I was going to need local food when local food wasn’t growing. I dove in on the pickles and basically spent a day teaching myself how to go through the process.

It was brutal. The second guessing was rampant; I had no idea if what I was doing was correct. I was using a recipe given to me by John and Belle Shisko, an older couple who sell various produce items like chestnuts, kale and figs to the co-op. I didn’t know if the proportions were right with the vinegar, if I needed sugar or not, how long to process, and on and on. The recipe and my source book Putting Food By had different methods than all the Internet sources I found. I decided just to stick with the recipe. The Shiskos are in their 90s, so the recipe couldn’t be too detrimental to my health.

The funny thing about all this is that both of my parents can food every year, or at least used to. My mom works primarily with jams and my dad does spaghetti sauce from his garden tomatoes. Yet neither of my folks thought to teach me this basic process, and I never thought to ask them to teach me. I seemed content to watch or walk in and out on the process. Now when I need the knowledge, I have to plow through a book instead of relying on passed on skills.

It seems this way with a great many things, things our parents or other family members knew how to do with some competency or even with great skill, yet these things are not passed on to a willing, able, and many times enthusiastic next generation. My grandfather was an amazing welder, practically inventing aluminum welding during World War Two. But I don’t know how to weld, never even held a welding stick during countless visits to his shop as a kid and as a young adult. The offer was never made, the desire on my part never expressed, and the fault of dropped knowledge was spread among all those involved.

It has been my intentionand practice for quite sometime to teach and pass on as much of the information and skills I have to anyone who will read or listen or follow along. It is also my intention to never let an opportunity for learning, for adventure, for submerging in tangible skill building exercises in everything from identifying wild edibles to fixing a lawnmower, pass me by. I encourage skill sharing among other folks I know, engage in mutual aid whenever possible and spread the DIY ethic in my daily life. In whatever we are dealing with, more community and more cooperation and more learning from others is never a bad thing.

Anyway, back to the pickles…

Recipe for Kosher Dill Pickles (Warning, the salt and vinegar may or may not be found locally produced. I had a bunch in the stockpiles.) –

1 – Wash jars; heat lids and rings in water not quite to boiling and leave in hot water until needed. Add water to canner (a little more than half full if using quarts, more for pints because they displace less water when added to the canner) and begin to heat.

2 – Boil the following ingredients, then set aside. This is enough to fill approximately 7 quart sized canning jars.

9 cups water

3 cups white vinegar or apple cider vinegar

1/4 cup Kosher salt

3 – In each canning jar place the following ingredients.

4 slices of garlic, two on bottom two on top

2 sprigs dill

optional – 4 peppercorns

cucumbers, whole or sliced lengthwise or rounds

4 – Place filled, tightly closed jars into warm/hot water in canner. Water should be several inches above the lids of the jars.

5 – Cover the canner and bring water to a boil.

6 – Reduce heat to medium and boil for 9 minutes being careful to keep the water between 180 and 185 degrees.

7 – Remove the jars and set aside to cool overnight. Test the seals by making sure they aren’t popped up and remove the rings so they do not rust. Store pickles in a cool place.

Recipe from John and Belle Shisko with canning embellishments by me.

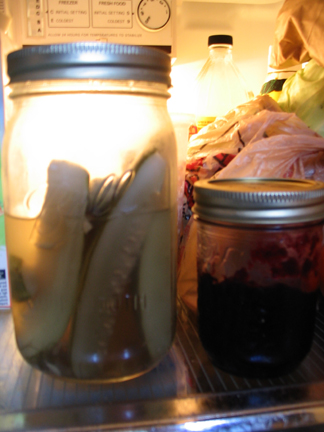
Pickles in fridge

The real test of the pickles was taking a quart to dinner at a friends house. Everyone ate at least two, and I considered that a success. Now on the next project…sauerkraut.

This entry was posted in food preservation, food sources, recipes. Bookmark the permalink.

3 Responses to Preserving knowledge

  1. marye says:

    it was fun reading..I can often and I had forgotten how daunting it can be at first!

  2. Alis says:

    I wonder sometimes if one day no one will remember how to do certain things. Books might help, but they are no substitute for hands on training with some master of a craft. I only wish I could learn from my mom the details & tricks to quilting that she knows…. alas things like work & life get in the way. Why is it in a day of some many conveniences that no one has much time? Glad you are do this. Its inspiring.

  3. jennbecluv says:

    Hey Trace! Love what you’ve been doing lately. I’d eat your preserves! :) I made sweet and hot curried squash pickles last week – if you like fire in your mouth, grab the recipe off my blog and give them a go. Did you ever try making the beet sugar then? Just curious.

Shopping Basket