lard pie crust

Lard pie crust

We have a lot of rendered lard in the freezer,and by “a lot” I mean quarts and quarts and quarts of it. I have used the lard a few times in biscuits, but it just doesn’t seem to go away very quickly. In the totality, recipes that use lard do not use that much lard.

The new thing is using lard in pie crust. The easiest way to make pie crust with lard is to use a food processor. Yeah, I didn’t really believe it would work either, but now I would not make a pie crust without one.

1. Step one is to find a food processor. We found ours at a thrift store in Siler City (along with a book on theoretical physics and eight rolls of expired 35mm film).

Actually step one is to put a little jar of water in the freezer, about ten tablespoons worth.

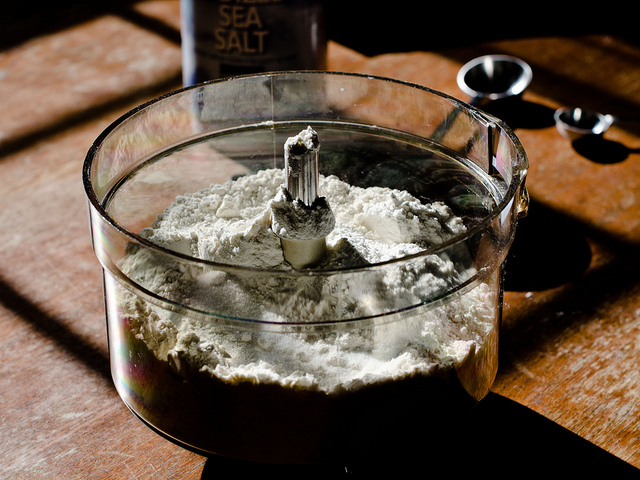
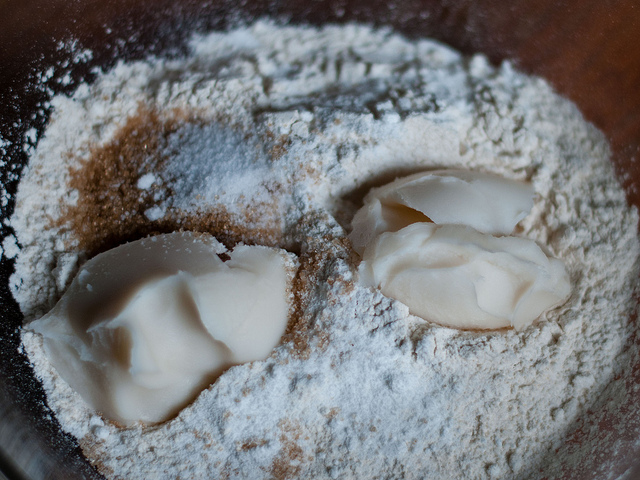
2. For a two crust pie (top and bottom crust) add 2-1/2 cups of flour.

3. Add 1/2 teaspoon salt.

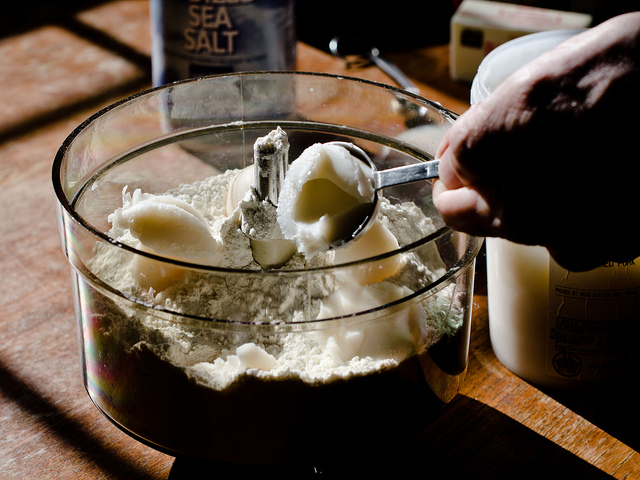
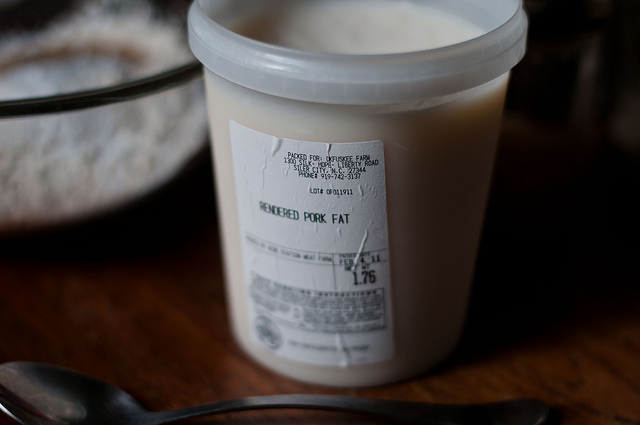
4. Add 10 tablespoons of lard and 10 tablespoons of butter. You can try all lard if you want.

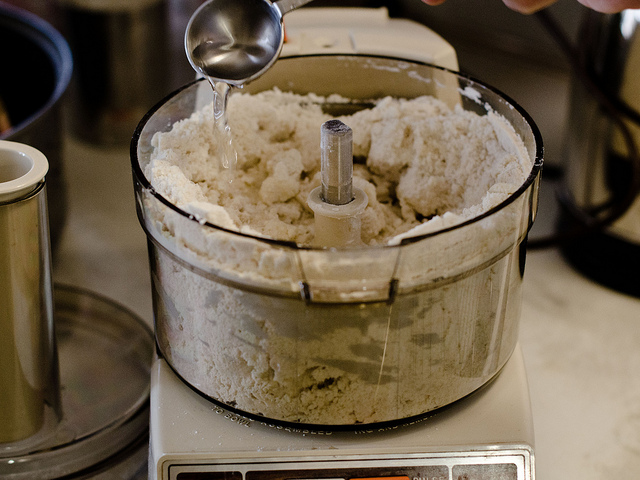
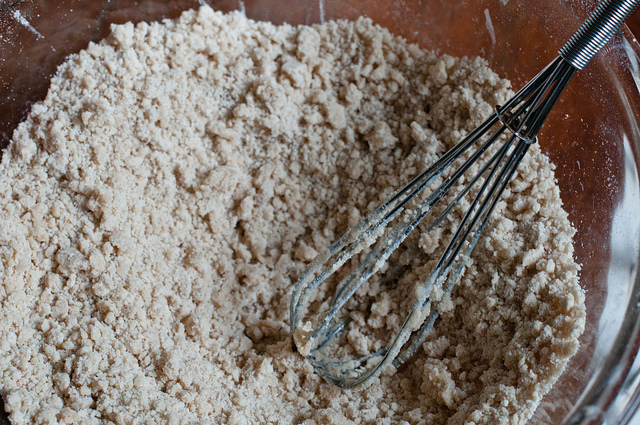
5. Add a few tablespoon of the water from step one. Use the pulse button on the food processor a few times.

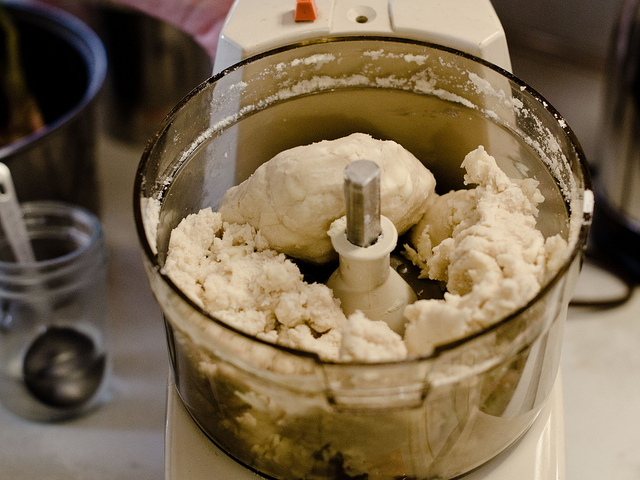
6. Add a tablespoon at a time until the dough is wet enough to just stick together. Should be between 5 and 10 tablespoons total.

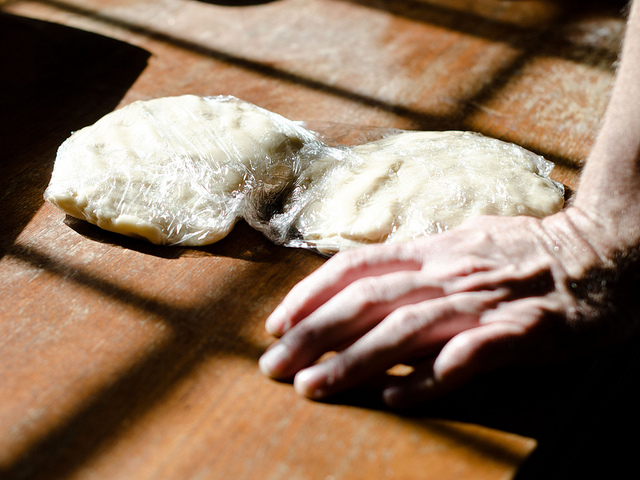
7. Smash the dough together then split in half. Flatten the dough and wrap in plastic. Place is the fridge for at least an hour before using or put the dough in the freezer for later use.

8. Use in your favorite pie recipe.

This entry was posted in food sources, recipes. Bookmark the permalink.

Comments are closed.

enough of that crap lets make biscuits

Enough of that crap; let’s make biscuits

One of the best things about moving to Durham has been living in a house with an awesome stove. It is a 1950s era General Electric push button electric with a double oven. I had never even seen a double oven before this one, and now I don’t think I will ever be able to give this one up.  It is quick to heat up and gets right down to business. So, what to make with it?

I happen to be the happy owner of about twenty five quarts of rendered pork lard. I threw last year’s lot of hog fat in with Bobby at Okfuskee Farm in order to get to the minimum amount that the slaughterhouse would render. As a result, the package label has Okfuskee Farm on it. No matter – it is all good stuff.

Surprisingly, I haven’t made biscuits in the past. Most of the recipes I found called for shortening, margarine or vegetable oil. I wasn’t sure if lard would bake any differently.

1. Add one half cup of lard to two cups of flour, one tablespoon of sugar, one teaspoon of salt and three teaspoons of baking powder.

2. Mix the lard into the flour with a wire whisk until the dough gets crumbly.

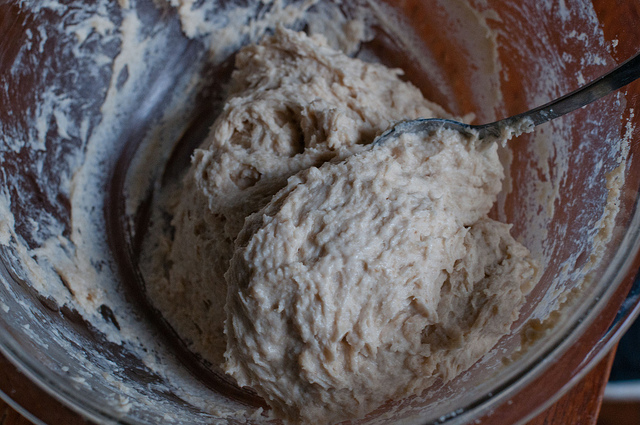
3. Stir in 3/4 cup of milk and stir until the dough starts to stick together. But don’t stir too much!

4. Scoop the dough out onto a floured surface and knead lightly up to ten times.

5. Pat the dough down and roll out the a 1/2 inch thickness.

6. Cut the biscuit rounds with a floured metal measuring cup, an inverted glass or just make them with your hands.

7. Put the dough on an ungreased baking pan or cookie sheet.

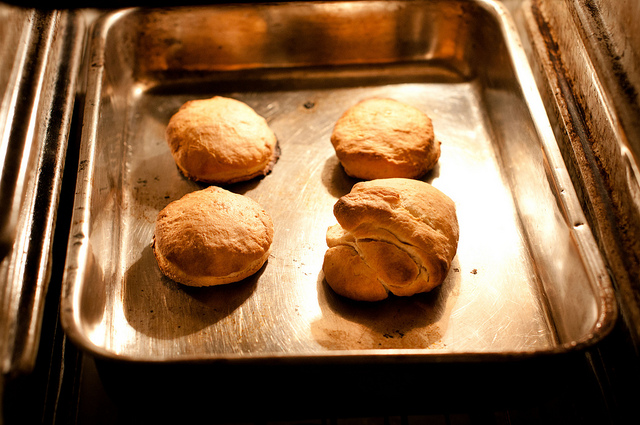
8. Bake for ten minutes at 450 degrees.

9. Tell Kristin that they are ready!

This entry was posted in food sources, house, recipes. Bookmark the permalink.

3 Responses to Enough of that crap; let’s make biscuits

  1. Marlow says:

    Oh boy. My extended family would very much approve!! One of my friends, Hanne, has a super old double oven by Frigidaire called ‘Flair’ it is by the coolest thing I have ever seen! The burners can be pulled out or pushed in flat with the wall.

  2. Anna says:

    Looks delicious. Made wild boar lard myself, it’s a snap to make– you should try it! You can’t beat lard in biscuits or pie crust.

  3. fLoreign says:

    They look virtually like my late grandma’s lard biscuits (especially the color is the same). I’m sure they even taste pretty close.

Cricket Bread garbage plate

eat carolina food challenge day one

Eat Carolina Food Challenge day one

This post is part of the week long Eat Carolina Food Challenge where participants are asked to submit a blog post every day of the challenge. Posts from all the other participants are aggregated on the Carolina Farm Stewardship website.

I am not a food separatist; I often find myself staring at piles of food wondering how they all could fit together in one dish. I am fond of soups and casseroles, and I would really like to get more into creating variations of bibimbap. One pile of food in a bowl is perfect for me.

Last August I wrote about a spaghetti squash garbage plate meal that I prepared from a bunch of summer vegetables. For my first dinner with the Eat Carolina Challenge, I figured I would revisit the premise and get all the ingredients into a pile and into a bowl (and into my mouth). The idea is pretty basic – just throw a bunch of stuff together that you think would taste good together. Throwing together things that don’t taste good together is bad news. Don’t do that.

For tonight’s dinner, I started with a pound of ground beef from Nooherooka Natural. To that I added some new potatoes, lavender bell pepper and garlic from Black River Organic Farm. To that mixture I added a handful of grape tomatoes from the same farm as well as a couple of spoonfuls of Pepper Dog Medium salsa.

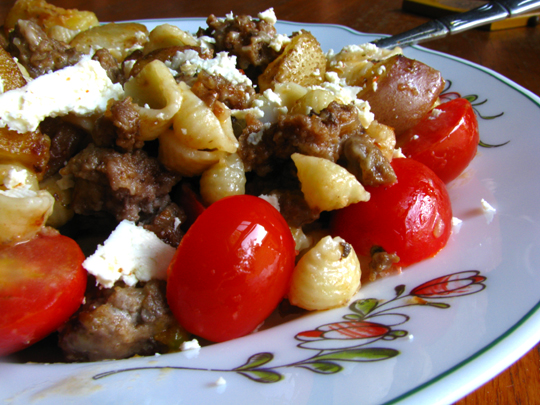
Lastly I threw in a box of “expired” organic mac and cheese (I am known around here as a food scavenger) made with Maple View milk and butter. I topped it all off with some chipotle goat cheese from Nature’s Way, and I had a concoction that looked a bit like dog food but tasted a whole lot better.

Cricket Bread garbage plate

This will also be my lunch at work tomorrow, making the challenge just a little bit easier…

This entry was posted in 100 mile diet, biographical, recipes. Bookmark the permalink.

Comments are closed.

quick pickled beets

Quick pickled beets

Robb has been including a fair amount of beets in the CSA boxes, so I have been saving them up to make one big dish instead of using them up individually. After a lifetime of turning up her nose at beets (it isn’t hard to do when your parents only serve gross canned grocery store beets), Kristin ate some pickled beets while she was on the road. She really liked them, so I decided to do a quick pickled version. She liked these as well…

Baby beets work great for this recipe.

1 – Remove the tops from the beets. You can use the beet tops in juices, soups or stocks if you want. I haven’t gotten that far with them yet.

2 – Wash the beets and boil for 20 to 30 minutes or until they are tender.

3 – Rinse with cold water and hand peel the skins. The skins will come right off just using your fingers.

4 – Mix up a marinade consisting of a pinch of finely crushed garlic, a pinch of dried oregano, a pinch of dried basil, one tablespoon of oil, one tablespoon of honey, 1/2 teaspoon of dried mustard (if you have it) and 1/4 cup of fruit scrap vinegar of whatever vinegar you happen to have.

5 – Slice the beets and add them to the marinade.

6 – Let the beets marinate for an hour, stirring occasionally.

7 – Enjoy the beets as a side or add to a salad of local lettuces, goat feta and radishes…

This entry was posted in food sources, foodshed, recipes. Bookmark the permalink.

3 Responses to Quick pickled beets

  1. Amanda says:

    Trace–
    I find your blog really inspirational, and I’m trying to make some fruit scrap vinegar of my own, using some grapes. I have one question, if you don’t mind.

    What happens if I leave the grapes in longer than the approximately one week you suggest? I didn’t read your instructions carefully enough the first time, and those grapes have been in the jar for about 3 weeks now….does it matter? It smells like vinegar…

    thanks!

    Amanda

  2. Trace says:

    I would think that the fruit would start to get moldy or deteriorate in the vinegar. If it smells like vinegar then there was plenty of sugar, and you can pull those grapes, strain the liquid and let it ferment some more with the sugar it already has. Grapes might not get moldy since they tend to fall to the bottom of the liquid while most other fruits will come to the top and get exposed to the surface air. That is what my blueberries did so I pulled them after a week.

  3. Amanda says:

    Thanks! I’ll remove the grapes tonight!

    I hope you don’t mind if I link to your blog from mine. I’d love for my friends to be able to click through.

shepherds pie

Shepherd’s pie

Back in November, I had some Shepherd’s (Shepard’s) Pie off the hot bar at Chatham Marketplace. It was pretty much the most amazing thing I have ever eaten…that contained meat. I emailed their chef to get the recipe, but he never got back to me. I ended up making my own seasonal version with some local lamb, veggies and scavenged potatoes.

1 – I started with a bunch of rainbow carrots from Black River Organic Farm (45 miles).

2 – I sautéed the carrots in goat butter with some leeks and kale from Robb’s CSA along with some wild garlic that I picked last summer.

3 – To the sauté I added some ground lamb from Rainbow Meadow Farms (103 miles). This stuff is good, but rather expensive. Good for a once in while meal, which is why I only bought a few pounds of the stuff. I will probably use ground beef for this dish in the future, thus changing its name to Cottage Pie.

4 – Brown the lamb with the vegetables. Add some salt if the butter you use is unsalted.

5 – Add a bit of beef stock or do like I did and add some leftover beef stew.

6 – Simmer with the beef stock until the mixture gets somewhat thick. While that is going on, boil two pounds or so of potatoes and mash them when they get soft.

7 – Place the lamb and vegetable mixture in a baking dish.

8 – Cover the mixture with mashed potatoes. Bake at 400 degrees for thirty minutes.

9 – Serve with mixed salad, steamed kale, bread and goat cheese.

This entry was posted in food sources, foodshed, recipes. Bookmark the permalink.

4 Responses to Shepherd’s pie

  1. BS96 says:

    That looks pretty durn good!

  2. Trace says:

    Yeah, it was really damn good.

  3. Ali says:

    I’m seriously drooling right now.
    (Mental note NOT to check out your blog before lunch time!)

    that looks so good!

  4. tigerhorse says:

    Amazing…definately gonna try that one out! Chili recipe coming soon…

simmering beef stew

beef and cabbage stew

Beef and cabbage stew

I used to make the best vegan seitan stew, modified from several recipes I used to use for regular beef stew.

Now that I am back to being an omnivore, I was looking to make a more seasonal stew using local meat. The store started carrying stew beef from Nooherooka Natural farm (90 miles) and I have a bunch of carrots, leeks and cabbage from Robb’s fall CSA. I have never used cabbage in the stew before.

1 – Brown one pound of stew beef in a little oil or bacon grease.

2 – Add several leeks, a few cloves of garlic, two teaspoons of salt, 1/2 teaspoon of paprika (if you have it), 1/4 teaspoon pepper (again, if you have it), four cups of water and a bay leaf.

3 – Bring the mixture just to boiling, reduce the heat and simmer, covered, for thirty minutes.

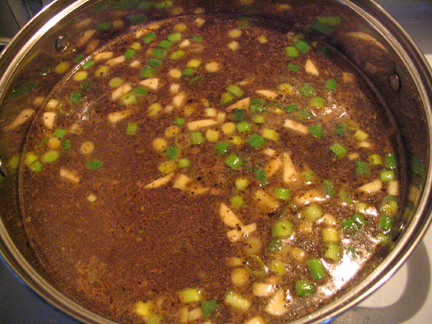
simmering beef stew

4 – Stir in lots of carrots, potatoes, green beans and a few cups of shredded cabbage. You can add pretty much any vegetable that is in season or anything you have frozen including corn, celery and peas.

5 – Add a quarter cup of rice, return to a boil.

6 – Reduce heat and simmer for another thirty minutes or so or until all the vegetables are tender.

7 – Remove the bay leaf.

8 – In a jar, combine a half cup of water with a quarter cup of flour. Shake the mixture until it is combined.

9 – Add the flour and water mixture to the stew. Cook and stir until thickened.

10 – Season to taste with salt, pepper, cayenne pepper or whatever you like. Enjoy with a few slices of hot no knead sourdough bread.

This entry was posted in food sources, foodshed, recipes. Bookmark the permalink.

3 Responses to Beef and cabbage stew

  1. Helen says:

    Trace, That stew looks lovely, the ultimate comfort food! In the meantime, I’ve tagged you! Check out my latest post (http:www.//helengraves.co.uk/?p=168).
    Helen.

  2. Tigerhorse says:

    “I love this blog!”

  3. Laurie says:

    That sounds good! I love cabbage, but I don’t think that I’ve ever put it in beef stew.

upside down turkey

Upside down turkey

This past week the store started carrying meat from Rainbow Meadow Farms, a family farm right at the 100 mile mark in Snow Hill, NC. The first delivery consisted of a dozen pastured turkeys. I brought home a fourteen pounder to cook for a holiday meal.

This would be the second turkey I have ever cooked, and the first truly local one. Last year at Thanksgiving I cooked an organic bird from who knows where. I missed an opportunity to get a local turkey this Thanksgiving, but was glad Tidal Creek finally got a delivery system in place for Rainbow Meadow.

I cooked both turkeys “upside down”, meaning the breast faces down in the pan instead of the traditional way of roasting the bird with the breast up. The effect of cooking the turkey breast down is that all the juices from the roasting flow down into the breast. This is a good thing.

1 – Let the turkey sit out (in its wrapper) for an hour or so. Preheat the oven to 400 degrees near the end of the hour.

2 – Wash the turkey, remove the neck and innards and pat the turkey dry. I don’t eat the innards (yet), but I saved the neck to make some soup stock later.

3 – Get the turkey into the roasting pan. Rub it with salt and either butter or olive oil.

4 – To the inside of the bird, add a couple chopped carrots, leeks, garlic, basil, thyme and rosemary.

The leeks and carrots are from Oakley Laurel CSA, the garlic from Black River Organic Farm and the basil from my garden. The other herbs were from the dumpster.

5 – Tie the legs tightly together so that the veggies don’t fall out.

6 – Flip the turkey breast side down, rub with salt and butter/oil and sprinkle with herbs.

7 – Here is how my turkey baking time came out – 400 degrees for a half hour, 350 degrees for two hours and 225 for one hour and fifteen minutes. I also turned the turkey over for fifteen minutes at 350 to slightly brown the breast. The two important cooking times are the 400 and 350 degree times. The 225 degree time will vary by the size of the turkey. Use an instant read thermometer to be sure. The temperature in the deepest part of the thigh should be over 165 degrees when fully cooked.

8 – After removing from the oven, let the turkey rest for at least fifteen minutes before carving.

9 – My method of carving is to just randomly cut pieces off. I really can’t give anyone advice on how to do it since I really don’t know what I’m doing. As long as good chunks of the meat come off, I’m happy. The rest can come off in soup.

There are still three of these local turkeys in the frozen meat section at Tidal Creek if anyone is interested…

This entry was posted in 100 mile diet, food sources, recipes. Bookmark the permalink.

Comments are closed.

bread success

Bread success – no knead sourdough

After discussing my bread problems on a previous post, I received quite a few helpful tips from readers and friends. El at Fast Grow the Weeds sent me a link to a no-knead bread recipe from the New York Times. The beauty of this recipe is that you let water and time do the work that your hands and back would usually do. Instead of using physical energy to create and expand the strands of gluten in the dough, the water (given eighteen or so hours) does the job for you.

I was skeptical, and, since I do not have packaged yeast, not convinced that I could make a sourdough no-knead loaf. I figured I would need a pretty strong and pretty watery starter to make everything work. After searching for no-knead sourdough recipes, I decanted a couple to try. This recipe is what worked for me.

Wait. First, a short discussion on my collection of sourdough starters…

This stuff is great if you take care of it. I use it a lot, and try many different flours in their creation and maintenance. I had three starters going, each with its own type of flour, but now I am down to two. If you don’t have a jar of starter and you make bread or pie or pancakes on a weekly basis then you are really missing out.

So I am down to two starters now. I was using graham flour in the one that died. It was getting pretty funky towards the end, losing its sweet aroma and leaning towards some kind of rotten smell. I don’t have a theory as to why the graham flour starter didn’t last. Maybe someone else has the answer. Here is the graham flour starter before I composted it:

It was pretty lifeless even after I fed it.

I also have a questionable starter that I feed whatever free flour I bring home from the store. It has recently eaten garbanzo bean flour, soy flour and a variety of other strange varieties.

It is still alive and smells fine. It does not bubble as much as my most active starter, the one I feed Southern Biscuit Flour, the only local flour I have available at the moment.

This one loves being what it is and performs no matter how long I neglect it or knock it around. It is my wild yeast workhorse, and I can’t praise it enough. I used this starter in the following recipe.

1 – Mix a sticky dough with three cups of flour, one cup of sourdough starter, one cup of water and one teaspoon of salt. You can also add just a dribble to honey to get everything real activated.

2 – Mix everything well, cover with plastic wrap and let sit for twelve to eighteen hours on your counter or other warm place. Sixty-eight degrees works well for mine, but seventy would be better.

3 – When the dough is ready it will have doubled its size (at least). Scoop the dough out onto a floured board.

4 – Form the dough into a ball, adding about a quarter cup more flour in the process. Don’t do too much work with the dough, just get it into a ball shape.

5 – Put the ball into a baking dish that has a cover. I am using a casserole dish at the moment, but have a cast iron Dutch Oven waiting to be put into service.

6 – Let the dough rise in the baking container. The recipes I found say everything from one to six hours. Use your best judgment.

7 – Place the baking dish (with cover) in a cold oven, set the temperature to 450 degrees and bake for one hour and ten minutes.

8 – Scrape the bread out of the container and set on a plate to cool.

Kristin says this is the best bread ever. It is really damn good.

Next up is Duncan’s beer bread…

This entry was posted in fermentation, recipes. Bookmark the permalink.

11 Responses to Bread success – no knead sourdough

  1. jessica says:

    Wow – that looks fabulous. I’m envisioning some mini ones filled with butternut squash soup…mmmm.

  2. Sandra says:

    Help! I followed this recipe and instructions exactly (well, I did add about 1/3 cup flax seeds) and my final product looked nothing like yours. First, after 45 minutes i had to take it out of the oven because it smelled like it was burning. It was cooked all the way through and in fact had stuck to the bottom of the pan. Are you sure you don’t need to grease the pan before baking? Second, my loaf didn’t rise nearly as high as the picture of your loaf, or a loaf I would buy from a bakery. Was it the starter? My starter looked bubbly and alive so I’m not sure where I went wrong. Third, my dough was really sticky the whole time. Any ideas why mine came out so differently?

  3. Trace says:

    Sandra:

    Leave out the flax seeds for now. You might want to add a bit more flour to the mixture since it was overly sticky. Also, it sounds like it didn’t rise as much as it should have. Try the recipe with regular yeast and see if you have better results. The sourdough starter you have may need a lot more time to rise properly.

    You can grease the bottom of the pan if need to be and adjust the baking time if needed. Unfortunately you will need to do some experimenting to get your setup to work for you. Hope this helps. Keep trying though!

  4. Lil says:

    I had the same stickiness problem as Sandra. It did not rise the 2nd time. Is it possible to proof the dough too long the 1st time where the yeast in the starter dies? I proofed for 18 hours.

    Thanks.

  5. Trace says:

    The time frame shouldn’t be a problem as there is plenty of flour and water for the yeast. In theory the yeast will keep eating and get more sour.
    The stickiness can be addressed by adding flour until it isn’t a problem, but be careful not to add too much. The dough ball will be somewhat sticky no matter what since you aren’t kneading it yourself and letting the water do the work.

  6. Suzi says:

    Well, my starter like yours, is pretty amazing. It is ALIVE!! First time I tried this bread, I used whole wheat flour. AND I didn’t have a dutch oven, so I put it on a pizza stone and baked it that way. It turned out ok, but was very dense!! Sooooooooo this last time, I followed everything exactly! It only took 3 hours for my first rising, and then I added 1/4 cup more flour, and again…. it almost tripled in 3 hours!! (I live in the desert and it is warm here). So this time I had put it into an oiled pyrex baking dish, but it rose so high the lid wouldn’t fit. I covered it with foil and baked it as per your instructions. The bread turned out beautifully! It has an interesting texture. Probably because it trippled instead of doubled! It makes fabulous toast! Thanks! I’ll keep playing with this thing! All starters are different. That could be the key to success. Mine was started in Denver, and I sneaked it home in my luggage. It is truly bubbly and hungry! It loves every feeding!! Thanks for your great website!

  7. Pingback: A Fabulous Collection Of Easy Southern Recipes. | 7Wins.eu

  8. Dan says:

    Great recipe – worked perfectly the first time, almost rose too high (next time I will slash the top). Tip for sticking – I let mine second rise on greased parchment, and lowered the bread on the parchment into the pre-heated dutch oven. Came out fine.

  9. I’ve been practicing with this method a bit and have found out some things that may help others. My starter was not sour enough so I did the “handful of grapes” thing where you mash them and mixed them with some starter and extra de-chlorinated water. After a day I strained this goop thru a colander and added this souped up mix to my existing starter along with the next flour/water addition. This really got things going!

    I feed my starter daily, never discarding any and keep it in a huge Tupperware bowl with a lid. Over several days I eventually have about a gallon of goo that’s all bubbly and sour. I take about a cup away, feed it and put it in the fridge for the next batch. The remainder becomes my bread with just the addition of a cup of powdered milk, some salt and approximately 3 cups of high gluten flour. (I use a product called “Bouncer”.) It gets mixed in the big bowl, rises for about 12 hours because of the high yeast content and then I divide it into two loaves. Seems one loaf is never enough for all the time and effort and it freezes well. I use a knife and a spatula to cut and separate the ‘mass’. I try not to get my hands into it until I’m flattening. I do the 1/3 then 1/2 fold and then sort of pinch off the seams and shape it into a nice ball.

    I prepare my pots before I divide my dough for the final rise. I rub solid shortening all over the inside of a club aluminum dutch oven and a large 5 qt corning casserole. I then add a generous 1/3 cup of cornmeal and roll the pans until they are well coated. I find that the cornmeal acts like little ball bearings and helps the loaf release very well from the pan.

    This dough is very goopy and floppy to work with but gives me the big holes and sour taste we love. Oh, and I scrape the bench flour off the counter top that is left after I get the dough into the pans and I add that bench flour to my starter. It has bits of dough and ‘stuff’ in it that just goes right back into the starter. I never waste any of my starter or flour, just keep adding it back in.

    Hope this helps anyone who is enjoying making sourdough at home from scratch.

  10. Isis says:

    I am a newbie at sourdough and have made it my mission to learn :) I made my starter from unbleached bread flour. I had to leave it near my heater vent because of the massive temperature fluctuations in my house (long story), and it never gets over 100 degrees. It looked like it was great after only 1 day, bubbly and beer-y smelling, so I went ahead and made my first attempt. I used 1 cup of the starter and 3 cups bread flour, 1 cup water and 1 tsp salt, kneaded it in my mixer and let sit for about 18 hours. It seemed to (maybe) almost double. I then took it and formed into a ball, but it seemed to have fallen a bit. Step 4 confused me, it said put on a floured board and dont work it too much, just form into a ball, but add about 1/4 cup flour.. is that the flour on the board, or should i have added an extra 1/4 c and worked it in? It seemed that by doing so, I would be working the dough too much. I only used 1/4 c to flour my board and worked that in a little bit (mainly on the outside though), maybe that is why it didnt rise on the 2nd rising? It is still very flat looking, but I went ahead and put in the oven. I have a feeling this try is going to be a failure :( I kept the rest of the starter, so hopefully I can work with that in a few days. I have a few questions in the meantime:
    The posting above said she feeds her starter every day… how much? and what? I know when i begin my starter, it said leave it out of the fridge… how do I know at what point i put it in the fridge? Also, most things i have read regarding a starter say to cut it in half every 24 hours, and add 1/2 c flour and 1/2 c water. Would it not stand to reason, if I want to make a larger batch of starter, and not waste any of it, just add 1c each of flour and water? I dont understand why you would want to throw out half of it each day (I am a very thrifty person, dont like to throw out useable food!). I dont have a compost bin, and it seems a waste to dump it down the drain. Also, if you see that your dough has not risen enough, is there anything you can do to help it rise or is it just a worthless cause? I have seen recipes state that it can take anywhere from 1 – 18 hours or more to rise, so i am a bit lost as to when i should just chuck it and start over. Sorry for the questions and confusion, but as I said I am a COMPLETE beginner. For now, I am assuming that I rushed using my starter even though it looked/smelled ready, and possibly did not add enough flour for the 2nd rise. Thanks for any help!

  11. Eve Rich says:

    I best like to no knead recipe as I like my bread to be soft and light. First I mix 2 cups of starter with one cup of flour and a little salt, no water added as my starter is watery. I mix it in a baking bowl with a spoon until is combined. This makes the dough soft and sticky but I do not want to add any more flour and knead it by hand as it would become too hard. I leave it overnight for about 20 hours or so until it at least doubles in size, usually it is two nights all together. Than I bake it in the same bowl without moving it, wiht a lid, and uncover it after half an hour to crisp the top. The moisture in the bread with help of the lid keeps it soft and gives nice crust.
    So try it yourself, as easy as 1, 2, 3.

bok choy

bok choy coleslaw

Bok choy coleslaw

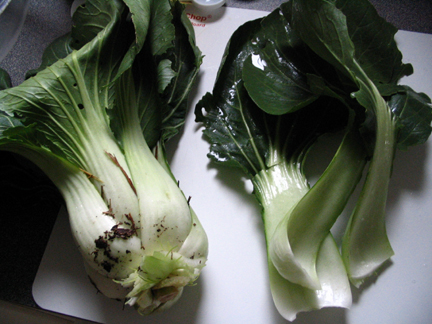
Cabbage is in season, and I am trying to figure out new ways to use the vegetable. Chinese cabbage is somewhat easier to use than head cabbage and often it is quicker to work with. This is a fast way to make a head of bok choy disappear. It isn’t a new way to use cabbage by any means, but most folks don’t usually use bok choy when making a coleslaw.

bok choy

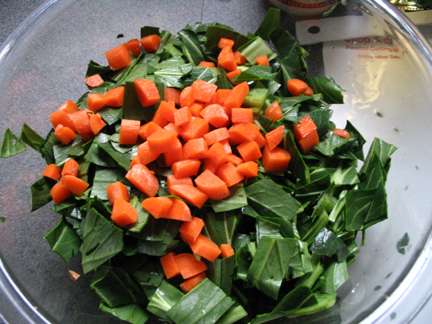
1 – Chop one large head of bok choy (about four or so unpacked cups worth) into pieces and strips. Add carrot, onion, radish, fruit or anything else that you like in coleslaw.

bok choy and carrots

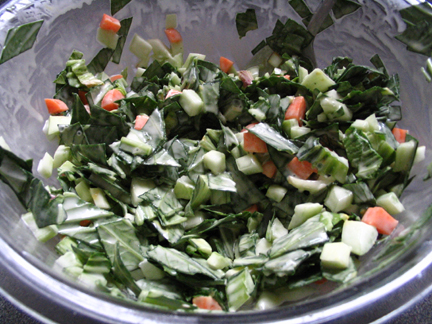
2 – Stir in one tablespoon of the vinegar of your choice. Add two or three tablespoons of mayonnaise or salad dressing. Add one teaspoon of salt and a bit of mustard.

coleslaw

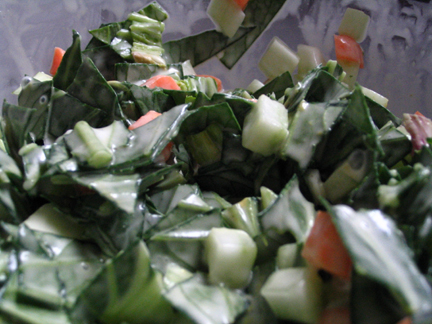
3 – Mix and your done. The most time consuming part of the process is washing and chopping the bok choy.

coleslaw close up

Warning: this stuff is very addictive. Kristin and I ate almost the whole bowl in one sitting. Be warned…

This entry was posted in recipes. Bookmark the permalink.

5 Responses to Bok choy coleslaw

  1. jessica says:

    Hey, where did you get those carrots??!

  2. Trace says:

    “Expired” bag of baby carrots…

  3. jessica says:

    Oh, that explains it. I got all excited and thought that carrots had come to the market.

  4. Kristin says:

    OMG – I need more – STAT!

  5. Keith says:

    Do you know any good Bok Choy ferments? I have a ton… literally, and I need to put it up.

pie crust recipe

apple pie from bruised apples

Apple pie from bruised apples

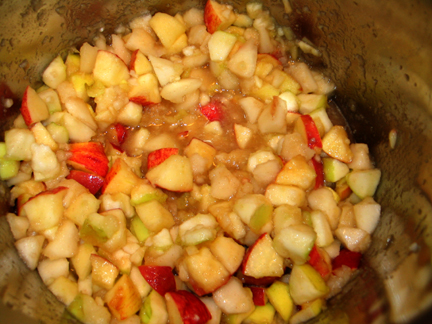
I have made enough chunky apple sauce from bruised and scavenged apples to last until spring. This Thanksgiving I used the apple sauce as the filling for a quick pie.

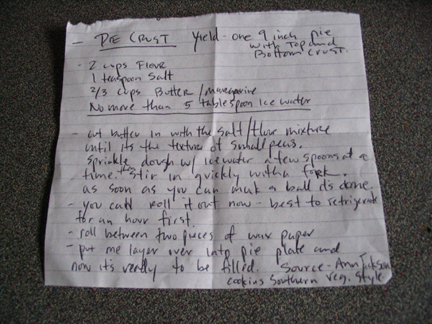
Last week my friend Mike gave me the recipe for the crust, and so I present my first from-scratch apple pie.

pie crust recipe

1 – Start by making the apple sauce.

2 – The crust is pretty straight forward. Mix two cups of flour with one teaspoon of salt and two-thirds cup of butter. I used goat butter, which can give the pie kind of a goaty flavor but I like it.

3 – When the dough starts to have a flaky texture and about half the pieces are pea-sized, start adding ice water in tablespoon increments. Don’t add any more than five tablespoons of water.

4 – Form the dough into a ball.

5 – Roll the dough out on wax paper. No wax paper? Just sprinkle some flour on a cutting board or countertop to avoid sticking. I started with a roller but ended up just using my hands to flatten the dough.

6 – Use half of the dough to line a nine inch pie pan.

7 – Add a bit of flour, no more than a tablespoon, to your apple sauce to thicken it up.

8 – Pour enough sauce into the pie dish to get it almost to the top of the dish. Add some honey to the top of the filling.

9 – Use the other half of the dough to cover the pie. I did the lattice top. Sprinkle with cinnamon if you have it.

10 – Bake at 450 degrees for ten minutes then reduce heat to 350 and bake for another forty minutes or until browned.

Crust recipe is from Mike and is adapted from Cooking Southern Vegetarian Style.

This entry was posted in recipes, scavenging. Bookmark the permalink.

One Response to Apple pie from bruised apples

  1. Mike says:

    That looks killer! I’m gonna climb that lattice to the great apple pie in the sky….

sourdough pumpkin hickory nut muffins

Sourdough pumpkin hickory nut muffins

Sourdough starter is good for other things besides sourdough pancakes. Since I found a banged up pie pumpkin, I figured I would try to come up with a recipe using baked pumpkin along with the starter and some foraged hickory nuts. The result was a dozen muffins.

I started with a basic sourdough pumpkin bread recipe that I found and modified it beyond recognition.

1 – Preheat the oven to 350 degrees.

2 – Quarter a pie pumpkin, scooping out the seeds. You can save the seeds and roast them if you have the time.

3 – Place the quartered pumpkin skin side down in a baking pan with a quarter inch of water.

4 – Cook the pumpkin until it is soft. This usually takes about 30 minuted but will vary depending on the size of the pumpkin.

5 – When the pumpkin is finished baking, scoop the flesh from the outer skin and puree in a blender or food processor. If the pumpkin is too dry to puree, add a little bit of water to get it started. You will need only one cup of pureed pumpkin for twelve muffins. Turn the stove up to 400 degrees while you proceed with the next steps.

6 – Beat two eggs. Add one cup of sourdough starter.

7 – To this mixture add two and half cups of flour (your choice), half a teaspoon of salt, half a teaspoon of baking soda, one teaspoon of baking powder, three tablespoons of cinnamon, three quarter cup of honey and a handful of hickory nuts or whatever nuts you have available.

8 – Mix, being careful not to over blend.

9 – Pour the batter into muffin pans and let sit for twenty to thirty minutes.

10 – Bake the muffins at 400 degrees for twenty to twenty five minutes or until lightly browned. Check the muffins with a fork or toothpick. If the fork comes out clean then the muffins are done.

11 – Cool the muffins out of the pan.

Recipe wildly adapted from online resources and mostly made up as I went along…

This entry was posted in fermentation, recipes. Bookmark the permalink.

3 Responses to Sourdough pumpkin hickory nut muffins

  1. Excellent! Since running out of baking yeast a month into my 250-mile local eating adventure, I’ve been looking for more ways to use my sourdough starter. And since I have pie pumpkin and hickory nuts on hand, this recipe looks perfect! I’ll make it tonight.

    A book recommendation for you (one of my constant reference books along with Wild Fermentation and PFB, which I see you also count on):
    ‘Preserving Food without Freezing or Canning: Traditional Techniques Using Salt, Oil, Sugar, Alcohol, Vinegar, Drying, Cold Storage, and Lactic Fermentation’, by the Gardeners and Farmers of Terre Vivante.

  2. Trace says:

    Yes, I do have that book and I will add it to my constant reference section!

  3. Pingback: recipe » Sourdough pumpkin hickory nut muffins

WSW Breakfast

waste stream day one

Waste stream: Day one

The beginning of waste stream week was made a bit easier by the semi-annual Food Fair at Tidal Creek. I grabbed a few free samples of some breakfast cereal and a jar of cherry jam as well as a few sample packets of Annie’s Goddess Dressing.

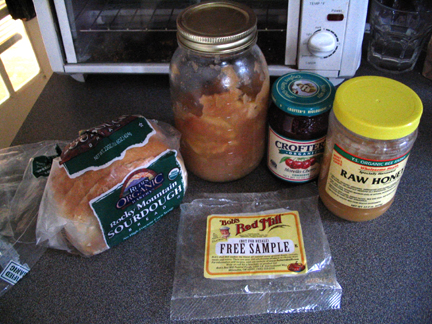
Breakfast on day one consisted on some ten grain cereal, some “expired” sourdough bread toast, some honey that was packaged with a fly in it (just scoop out the fly!), some cherry jam and apple sauce made from damaged fruit.

WSW Breakfast

I skipped lunch because I was too busy checking on the status of the neighborhood pecan trees. I was able to pick up a few pounds of the nuts, but the big drop is still a week or so away.

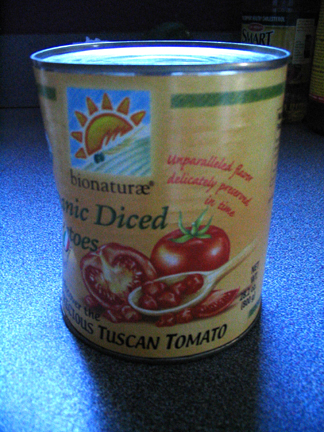
Dinner was a very basic ground turkey goulash modified in such a way that it does resemble traditional goulash in any way. I used green pepper, tomato sauce and garlic. I started with a dented can of tomatoes.

canned tomatoes

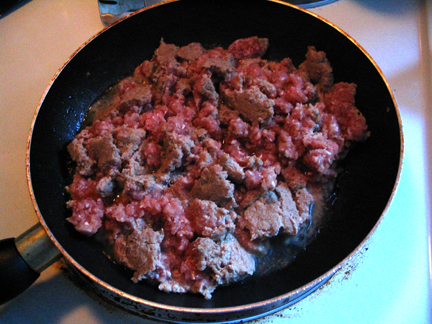
I then fried up some ground turkey that had opened up at one end when it was removed from the case.

opened turkey

turkey cooking

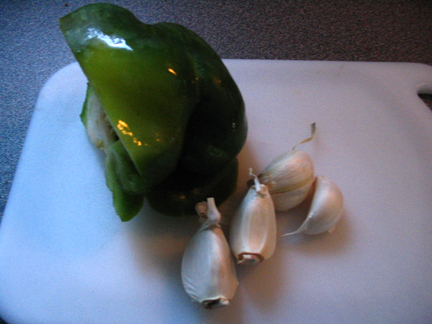
I then added some green pepper that had some soft and bad spots and some stray and sprouting garlic cloves, all destined for the compost bucket.

green pepper and garlic

Making this meal is easy even if you only have a few ingredients.

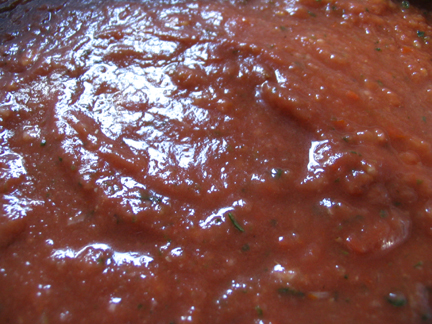
1 – Cook a can of tomatoes for a few hours just adding some salt, oil and garden basil. If you don’t have any extra ingredients, just the tomatoes will do. Cooking at a slow simmer for a few hours brings out the flavor and hides the sweetness of canned tomatoes.

2 – In a skillet, brown the meat of choice or some tofu, whatever you have will work. You can add salt and other spices, anything available such as oregano, basil and marjoram.

3 – When the meat or tofu is browned, add green pepper and garlic. Cook until the green pepper is soft.

4 – Add the contents of the skillet to the simmering tomato sauce.

5 – Bring everything to a slight boil then reduce to a simmer. Cook for another twenty minutes or until all the flavors are mixed nicely.

6 – Serve on pasta, fried potatoes, spaghetti squash, fried butternut squash cubes, anything you can find that you think would taste good with the sauce. The mixture could also be served on toasted bread or bagels.

The possibilities are only limited by what you have on hand, which is the essence of waste stream week. What did I find, and how can I make a balanced meal out what I now have available.

This entry was posted in food sources, recipes, scavenging. Bookmark the permalink.

Comments are closed.

culled fruits

assignment apple sauce

Assignment: Apple Sauce

Dear Reader –

I have an assignment for you and me. We are going to enter the mainstream food waste river, together. We are going to pick a grocery store in our neighborhood, we are going to approach the produce manager or, preferably, a produce worker, and ask for a day’s worth of bruised fruit. We’ll tell them we prefer apples and pears, that it is for an art project or whatever it is that you want to tell them, that you will pick the fruit up on such and such a day at such and such a time. We won’t leave them hanging.

We are going to salvage twenty or so pieces of fruit and make them into apple/pear sauce. I do this with bruised fruit at work where bringing home culls is standard practice, but it would be interesting to expand the reach into more hostile territory. Directly engaging workers and collecting the waste of their day’s work is not something most of us think about, but I am asking you to put aside any fear you have of approaching these folks. They are just like you and I – a stomach to fill, rent to pay and dreams of how to spend a day off.

If anyone says they can’t give you fruit for legal reasons, let them know that (at least in North Carolina) there are laws protecting grocery stores that give away food. Specifically,

Chapter 99B. Products Liability.

§ 99B-10. Immunity for donated food. (a) Notwithstanding the provisions of Article 12 of Chapter 106 of the General Statutes, or any other provision of law, any person, including but not limited to a seller, farmer, processor, distributor, wholesaler, or retailer of food, who donates an item of food for use or distribution by a nonprofit organization or nonprofit corporation shall not be liable for civil damages or criminal penalties resulting from the nature, age, condition, or packaging of the donated food, unless an injury is caused by the gross negligence, recklessness, or intentional misconduct of the donor. (b) Notwithstanding any other provision of law, any nonprofit organization or nonprofit corporation that uses or distributes food that has been donated to it for such use or distribution shall not be liable for civil damages or criminal penalties resulting from the nature, age, condition, or packaging of the donated food, unless an injury is caused by the gross negligence, recklessness, or intentional misconduct of the organization or corporation.(1979, 2nd Sess., c. 1188, s. 1; 1989, c. 365; 1991 (Reg. Sess., 1992), c. 935, s. 2; 1995, c. 522, s. 1.)

Arguably we are nonprofit organizations unto ourselves. If you have success or failure accessing the waste stream in this way, please let me know by posting a comment. Once you have the fruit, here is the quickest way to make some sauce.

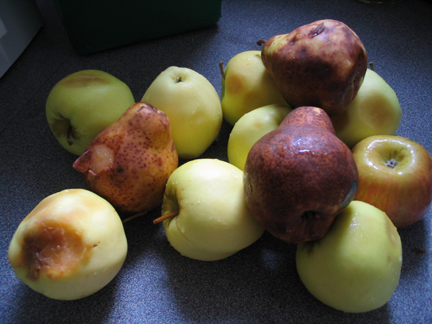
Here is the type of fruit that I bring home: bruised, cut, nicked and extremely overripe –

culled fruits

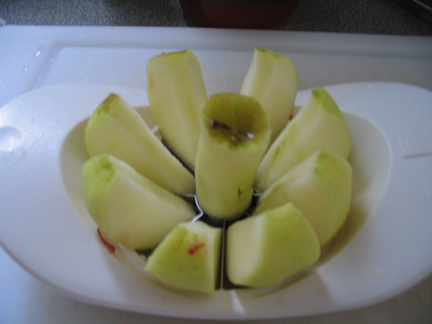
1 – Wash, core and peel the fruit. I usually only peel the worst looking fruit in order to cut out the bruises and such as well as any overripe skins. For apples, get yourself a $4 apple corer. You will go through the apples really quickly especially if you don’t have much trimming to do.

Cored apple

2 – Put all the fruit in a large stockpot. Add any sweeteners or spices that you like. I added honey and some cinnamon from The Stash. Also, add a little bit of water so that the bottom pieces are not scorched as you bring the temperature up.

3 – Heat the mixture to a boil then reduce the heat to a simmer.

4 – Stir the mixture often. Use a potato masher to crush the sauce. You could also use a blender to get more of a grocery store sauce consistency, but I prefer having lots of fruit chunks in my sauce.

Applesauce cooking

5 – When the sauce is the sweetness and consistency that you want, you can simply fill containers and stick them in the refrigerator or you can go through the process of canning the sauce for storage. I eat it so fast that it isn’t worth my time to can it.

Finished applesauce

6 – Enjoy the sauce on waffles, ice cream, sourdough pancakes, whatever!

This entry was posted in recipes, scavenging. Bookmark the permalink.

2 Responses to Assignment: Apple Sauce

  1. Jessica says:

    That apple/pear sauce looks amazing…count me in on the project.

  2. Trace says:

    Let me know how it goes…

Kudzu with blossoms

kudzu blossom jelly

Kudzu blossom jelly

I’ll just say it; kudzu sucks. If you have ever had to pull it out of a field or garden then you know what I mean. Kudzu (Pueraria montana) is the vine that ate the South, and it is really hard to eliminate without the use of heavy duty herbicides.

The original intention of its introduction to North America was to feed foraging ruminants like goats. It turns out that goats aren’t fond enough of kudzu to keep it in check, and the vine literally grows while you watch (I didn’t believe it either). This adds up to a serious problem for native plants and any tree that happens to get in the way.

There are, however, a few uses for the invasive vine. Baskets, cordage, root starch and additional honey bee forage all come to mind. You can even make a jelly from the purple blossoms that are at their peak at this time of year.

And, of course, I decided to give the jelly a try.

At its heart, jelly is basically slightly boiled sugar. Kudzu blossoms don’t have much in the way of sugar content, so every recipe I found for making the jelly called for several more cups of sugar than cups of blossoms. I decided to modify this in a few ways. One was to use honey and to use way less than is called for in a typical jelly recipe.

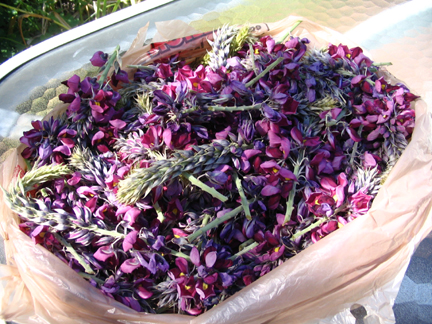
1 – Collect the blossoms. To make six half-pints of jelly, you’ll need to start with at least four cups of kudzu blossoms. There is a huge patch of vines adjacent to the part of the bicycle path nearest my house. I pass by it everyday on my way to and from work. Gathering blossoms wouldn’t be a problem for me, but you may have to ask around to find a spot of vines. If you don’t know what to look for, here is your target:

Kudzu with blossoms

A bag and a pair of scissors will make quick work of the collection. In about ten minutes I had all the blossoms I would need.

Collected kudzu blossoms

2 – Remove the blossoms from the stems and place is a colander. Rinse with cold water. Actually, I let the colander sit outside for a half hour in order to give the ants and other creatures a sporting chance. Otherwise they would end up in the rinse water, never to climb another plant or gather another speck of pollen. Then I rinsed the blossoms.

Kudzu blossoms

3 – Boil four cups of water. Place the blossoms in a glass dish, then pour the boiling water over them.

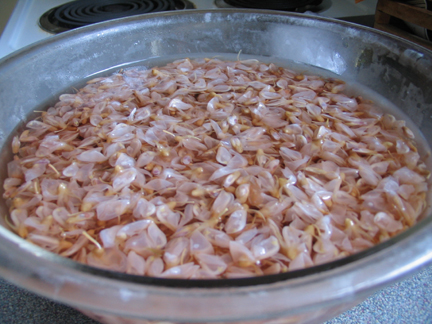
4 – Cover and refrigerate the blossoms and water over night. By the time you are ready to make the jelly, all the color will have washed out of the blossoms. The water will be very fragrant and will hopefully transfer that fragrance to the jelly.

Kudzu blossoms washed out

5 – Strain the blossoms and dump them into the compost. Their job is done.

6 – To the blossom water, add one tablespoon of lemon juice. This is for aesthetics (color) so it can be skipped if you don’t have a lemon tree or a bottle of concentrate in The Stash. You’ll also need a package of pectin. You can make your own if you have access to local apples. I used a box of commercially made pectin that I had in the cupboard.

7 – Bring this mixture to a rapid boil, stirring constantly as the boiling point gets closer.

8 – Most recipes call for the addition of five to six cups of sugar at this point. I used three cups of local honey. Bring this mixture back to a boil, stirring all the while.

9 – Remove from heat. By this point in the process, you should have your canning jars prepared.

10 – Fill the jars to 1/4″ of the top, seal and process in boiling water for ten minutes.

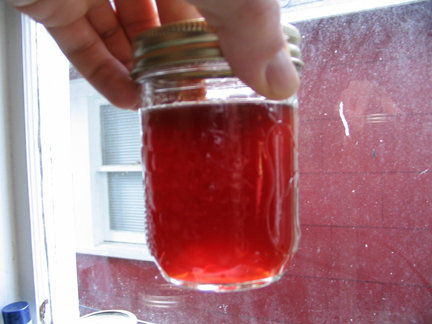
Finished kudzu jelly

The jar in the picture is what I had leftover after filling six jelly jars. The end result still tastes an awful lot like the honey I used, but it also has enough of a flowery taste to consider it a success. Next time I will probably use more blossoms and even less honey.

This recipe is adapted from various online resources and further modified to fit my restrictions.

This entry was posted in food sources, foraging, recipes. Bookmark the permalink.

5 Responses to Kudzu blossom jelly

  1. Pingback: Kudzu blossom jelly

  2. Marie Morris says:

    I was very pleased to find that there are other people who appreciate the fine qualities of a good kudzu blossom jelly. I have been making kudzu blossom jelly for a number of years and through many experiments have found that you can actually produce two flavors from the flowers. One looks and tastes a lot like a nice concord grape jelly with a floral taste to it, and the other looks and tastes like apple jelly. If you use all fresh purple blossoms and no stem tops on the blossom, you get a nice purple kudzu jelly. If you use the little greenish tips as well with your blossoms, it will give the jelly a golden cast to it and it tastes a lot like apple jelly. Both are delightful. I have followed the usual recipe of 4 cups of the juice to 4 cups sugar, 1 teaspoonful lemon juice, and one box of pectin, but I like to make two batches at a time and have found that you can do it successfully if you double your recipe, but you have to add a little extra pectin to the double batch. I use 3 boxes of pectin to a double batch and it works really well.
    Very happy to have found your delightful blog.
    Marie

  3. Brenda says:

    Hi,
    I am going to try to make my first kudzu jelly. We have a lot of kudzu around us. The purple blossoms smell so fragrant. I am going to follow your recipe. Hopefully, it will turn out good. I do not want it too sweet though. Should I cut down on the sugar?
    Brenda ( Georgia Girl)

  4. Trace says:

    You can cut down on the sugar, but the taste will be heavily floral. It seems that the floral taste diminishes over time though.

  5. Susan says:

    Oooo…nice! I think you could probably do this with Wisteria blossoms too. They are quite similar to Kudzu and they also lose their color when soaked in water. Wisteria is done down here in N FL this year, but I’ll have to try it next time around the sun. -sukey

sourdough pancakes

Sourdough pancakes

One of the first things I did when I started this project was bike down to Stoneground Bakery to ask for a bit of sourdough starter. Their starter has been alive for at least a year and has acquired what I think is an awesome taste.

Once at the bakery, I asked Danielle about the possibilities of buying a cup or so. She came back with Andrew, one of the bakers, and a pint container of bubbling starter. After a few quick questions on its care, I brought the starter home and outlined the possibilities.

I could make bread…All I had for flour at the time was the graham flour from Anson Mills. I had read that this flour needed to be mixed with some more refined flour in order to get a good bread, but I ignored all that since I didn’t have a source for a basic regionally milled white flour. (Thanks to Jessica at Fresh ThinkingLiving Local in Wilmington, NC, I now have a source with Southern Biscuit flour.) After a few miserable attempts at making bread with the graham flour I decided to move to other recipes.

I attempted sourdough biscuits using the same flour. They came out as hard as doorstops and about as easy to eat. It was obvious that baking this flour wasn’t going to net me anything resembling bread, so I fell back on the idea of pancakes.

I like the result I came up with.

I have been making sourdough pancakes for the past three or four Sundays. The pancakes are very tangy and are pretty fluffy. They are also easy to make and easy to freeze for later, which is especially good for me to use for weekday breakfasts. The pancakes go along great with my rice and honey in the morning.

I won’t get into how to make a sourdough starter from scratch since I cheated and bummed some from a bakery. Which is what you should do anyway. Step one on the road to sourdough pancakes is to find a bakery that makes sourdough bread and ask for a cup of starter. If they are decent folks – which they most likely are – you’ll walk away with a starter that will last your lifetime and more if you take care of it properly.

For the pancakes, you will need to know a day in advance that you want to eat them. Sounds easy enough, but you are out of luck if you forget. Without exception, the mixture in Step 1 needs to ferment overnight.

1 – Add 2 1/2 cups of flour (any flour) to 1 cup of sourdough starter and 2 tablespoons of some sort of sugar. I use honey, but you can use plain granulated sugar, brown sugar, agave syrup, maple syrup, whatever. Just don’t use fake sugars or Stevia. They don’t have what the yeasts and bacteria in the starter are looking to eat.

2 – Mix until smooth. Cover lightly and let sit overnight.

3 – In the morning, mix up an egg, two tablespoons of oil (if you have it) and 1/4 teaspoon of salt. Salt inhibits the fermenting and adds to the taste.

4 – Stir this mixture into the batter and mix until smooth.

5 – In the same bowl you made the egg mixture (why dirty another bowl?), add a teaspoon of baking soda to a tablespoon of warm water. Mix well.

6Carefully add this mixture to the batter. Fold the batter instead of stirring. The batter should begin to rise and bubble. Let it bubble for a few minutes.

7 – While you are doing all this mixing, you should have turned the heat up on a large skillet. The pan should be pretty hot when making pancakes.

8 – Pour pancake sized drops of batter on the hot pan, flipping when large bubbles appear on the surface. Keep finished pancakes warm in the oven or try to keep up with eating them as they finish. This might work better if you have a bunch of people.

9 – Finish up the batter by making one giant pancake in the shape of an octopus.

10 – Top with honey and preserves.

Recipe adapted from various online recipe sources, Wild Fermentation and my observations of the process.

The most important part of this process is to replenish your starter. To the original starter, add one cup of flour and one cup of warm water. Stir and let sit lightly covered overnight. Put the starter in the fridge until you need it again being sure to warm it up and stir it before using it in a recipe. Your starter will last indefinitely as long as you feed it.

If you are not going to use the starter frequently, you should still feed it at least once every two weeks. Dump out and compost about a cup and a half of starter then add equal amounts warm water and flour. Stir, let it get bubbly at room temperature then put the starter – covered – back in the fridge.

This entry was posted in fermentation, recipes. Bookmark the permalink.

3 Responses to Sourdough pancakes

  1. Kristin says:

    Next Sunday I’m challenging you to a pancake duel – I can make a mean bunnycake.

  2. Trace says:

    My bearcake will eat your bunnycake.

  3. Helen says:

    Hey there! I enjoy reading your site and I’ve tagged you for a meme. I hope you don’t mind! Helen.

    themoodyfoodie.blogspot.com/2007/09/tagged.html

Spaghetti squash shell

spaghetti squash garbage plate

Spaghetti squash garbage plate

I am originally from Western New York, specifically from the small town of Elba located half way in between Buffalo and Rochester. During college, trips to Rochester usually consisted of either a trip to the mall, a trip to the Great Great House of Guitars, or a trip to Nick Tahou’s for their signature Garbage Plate.

A garbage plate is basically a mess of various different foods. There are several variations in the Western New York area, everything from ethnic to vegan, but all share the common theme of a plate piled high with things that taste great together but don’t necessarily make the greatest looking dish. People who like all their foods separated with plenty of space would have a stroke at the sight of a garbage plate, so it is best if those folks stay away from said plate.

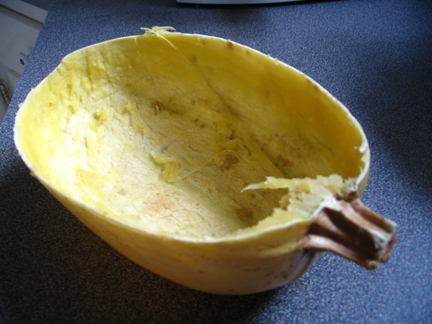
Last night I came up with an interesting garbage plate of my own, a combination of a bunch of summer vegetables and some things from the fridge. It ended up being a bunch of baked spaghetti squash from Hanchey’s (42 miles), some sauteed sweet and hot peppers from Black River (45 miles), two fried eggs from Grassy Ridge (19 miles) followed by some goat feta cheese (30 miles) and finally a few scoops of homemade sauerkraut. The result was amazing. It would have been more amazing if I had used the hollowed out spaghetti squash as my bowl, just like Jennie at Straight From the Farm is fond of doing.

Spaghetti squash shell

The recipe is really really basic, with the only necessary part being the spaghetti squash. The other ingredients are totally up to you. So I will simply show you the easiest ways to bake a spaghetti squash.

Option #1: To bake it whole, punch a few holes in the squash and place on a baking sheet. Bake at 375 degrees for 50 minutes.

Option #2: A halved squash cooks faster. Cut squash in half, scoop out the seeds then place hollow side down on a baking sheet with a 1/4 inch of water. Bake at 375 degrees for 30 minutes.

Once the baking is over, scoop out the strands of squash and combine with your own list of garbage plate ingredients. Try some vinegar, collards and cherry tomatoes or black beans and rice. Try apples and honey or butter, basil and chicken. Spaghetti squash is very adaptable to whatever you throw at it, so pile on the garbage…

This entry was posted in food sources, recipes. Bookmark the permalink.

3 Responses to Spaghetti squash garbage plate

  1. BS96 says:

    Excellent shout out to our old trips to Nick Tahou’s, but it would have been great to see your final squash garbage plate!

  2. Trace says:

    Yes, I would have taken a picture but by the time I thought of it, all that was left was the hull of the squash. Next time…

  3. jennie says:

    You’re so sweet to mention lil’ ol’ mio in your post, Trace. I’m liking this idea of a garbage plate…I’ve not seen it in a restaurant before but it’s a pretty accurate description of most dinners at my house. :) Ya know, for all the cooking and baking I do, I’ve never made a spaghetti squash. Weird, huh? I’d better get on that!

Quart of sauerkraut

making sauerkraut

Making sauerkraut

Fermentation is something that I only recently began to appreciate and learn about. Since picking up the books Wild Fermentation and Preserving Food Without Freezing or Canning, I have been taking on fermentation projects a few times a week. The kitchen is littered with quart mason jars full of various colors and smells, the fridge is home to some finished products and ongoing ferments (like sourdough starter) and our small basement holds a crock of developing sauerkraut.

If you have never had sauerkraut, I’ll ask you to consider giving it a try. The tangy, salty goodness is perfect on a tomato sandwich, on a salad instead of salad dressing or simply by itself. I have eaten the store bought variety from Bubbies right out of the jar, but it wasn’t until I pulled out a jar full of the stuff that I made that I truly appreciated the taste and amazed myself by how much of it I could eat. And eating it raw (unpasteurized) maintains the beneficial aspects of lacto-fermentation such as good bacteria, high quantities of vitamin C and keeping certain acids available to aid in digestion.

I started the process with a few heads of green cabbage from Black River Organic Farm (45 miles), a cabbage cutter, some salt and a Harsch fermenting crock.

1 – Weigh out the cabbage, either at the store when you buy it or at home if you have a scale. For every five pounds of cabbage you will need three tablespoons of salt.

2 – Measure out the salt you will need and place it in a bowl.

3 – Halve the cabbages and shred using a knife, a grater or whatever you have available.

I used a heavy duty cabbage grater and it made the process go very quickly.

4 – As you grate the cabbage, add it to the crock. As you add a layer, sprinkle the cabbage with salt. The salt will pull water out of the cabbage.

5 – Continue layering the cabbage and salt, pressing down occasionally with your fist or a utensil to press water out of the cabbage. Don’t fill the crock all the way to the top. I filled about 3/4 of the way up and compressed the cabbage further down.

6 – Once you have all the cabbage and salt in the crock, you will need to get enough brine generated to cover the cabbage and the weight (a plate or the stones that come with a Harsch crock) needed to hold the cabbage under the level of the brine. You can use whatever you have handy to do the pressing. I just beat the cabbage with my fist until I had plenty of brine and the cabbage was tight and compressed in the crock.

7 – Place a whole cabbage leaf over the contents to keep any bits of cabbage from floating in the brine.

8 – Add a weight to the top of the cabbage such as a plate or, if using a Harsch crock, add the two stones. Make sure that the brine covers the weight. If you need more brine, add salt water in a ratio of 1 tablespoon salt to 1 cup of water.

9 – If using an open crock, cover it with a towel secured by rubber bands. This is to keep dust and creatures out. If using a Harsch crock, put the cover down in the groove and fill the groove with water. Be sure to check on the crock periodically to refill the water.

10 – With a Harsch crock there is no daily maintenance required, only minimal inspection to check on the water in the groove. With an open crock you will need to scoop out any film or mold that forms on the surface. If mold forms be sure to wash the plate. Also be sure to check the brine level in an open crock and add salt water if needed.

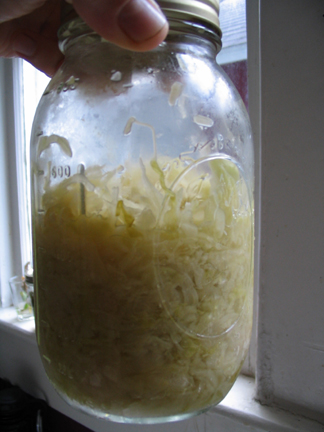
11 – In an open crock in warm weather you can start removing sauerkraut after a week or so. With a Harsch crock leave it to ferment for about 4 weeks then take a sample. Mine was good and tangy after 4 weeks. You can scoop everything out at once or just take a bit at a time. The sauerkraut will get better as it continues to ferment. I put my crock away after filling a quart jar with the contents. I’ll take out some more next week and the week after.

Quart of sauerkraut

This process is based on the recipe in Wild Fermentation with some tips from my experience and some additional instructions for using the Harsch crock.

This entry was posted in fermentation, food preservation, recipes. Bookmark the permalink.

10 Responses to Making sauerkraut

  1. marye says:

    you know, that is one thing I have never made..sounds like I should…we could call it science!

  2. Teresa says:

    Great write up! I love sauerkraut and started making it 2 years ago. The thing I love best about it aside from the taste, is that you don’t have to can it, as you mentioned. I’ll be doing salted green beans this week in basically the same way. These taste fabulous and also don’t need canning. I will look into the books you mentioned, they sound interesting!

  3. leissia says:

    home-made sauerkraut.. fond memories of the salad made by the mennonite/amish in lancaster county, pa. it had diced green pepper, diced apples, raisins, and i think a tad of chopped onion. heavenly stuff. those were the days of the ‘big kitchen’.. putting up local and garden goodies for the full year. fermenting pickles, green tomatoes, hot red peppers doing their strange ferment in jars lined up on the counter.. so pretty and so tasty! fermenting is a wonderful “lost” food-art.

  4. Trace says:

    This sauerkraut keeps getting better and better. I have been putting it on everything!

  5. Amy says:

    The whole Harsch crock makes this process sound much easier. I first read about home-made sauerkraut in The 100 Mile Diet and the process of skimming mold from the top really grossed me out. However, I think I’d try it your way without the open crock.

  6. Trace says:

    The Harsch crock is a great investment in food preservation. Get the biggest one you can afford.

  7. Dan Beougher says:

    I was taught how to make kraut by my German mother and have teaching a class on macrofermentation for a number of years. The Harsch crock is the best and easiest way to effortlessly ferment kraut, or as I did last summer, a crock full of pickled veggies. It’s a fantastic device well worth the price.

  8. Trace says:

    The Harsch crock is an awesome way to get started with fermentation and to keep at it.

  9. Tony says:

    Would it be possible to send me the instructions I lost to my harsch crock via e-mail?

  10. Kenny says:

    Just loaded up my Harsch 10L crock last night with my first batch of kraut! I used two heads of green cabbage, one head of Napa Cabbage, and two fresh green tomatoes from my garden (got a wild hair with the tomatoes but can’t wait to try it now!) I’m excited about my first batch and can’t wait to sample it.

mint and honey iced tea

Mint and honey iced tea

Tea is out of my 100 mile range, as is coffee and nearly every other caffeinated beverage known to exist. Before starting this experiment I drank a lot of coffee. I loved coffee; the taste, the smell, the stimulation. I drank it black, nothing to interfere with its various flavors of bitter, smoky or sweet depending on its area of origin and growing conditions.

I snuck coffee once after starting off this project, once when I helped Noel and Danielle at the Farmers Market. I didn’t regret it, but it prolonged the caffeine withdrawal symptoms for another set of days.

These days, my stimulating drink of choice is a “tea” made from a handful of spearmint leaves from my front garden, a splash of honey (7 miles) and a frosty half-pint mason jar. However, I have recently found out that yaupon holly (Ilex vomitoria) contains caffeine and grows in our area. It is the only native North American plant known to contain the stimulant. Noel just happened to have a jar of the leaves that he foraged and roasted. The jar is now in my possession, but I have yet to try the tea. For now, try this mint and honey iced tea:

1 – Pick a handful of mint. Mix it up if you have several varieties. I have spearmint and orange mint at the house, wild mint at the park down the street and peppermint at the co-op garden.

2 – Boil a cup or two of water.

3 – Remove from heat. Add most of the (washed) mint leaves and stems. Cover and let stand for 5 to 10 minutes.

4 – Pour the liquid into a glass jar. Add remaining mint leaves.

5 – Place the open jar in the freezer until ice starts to form at the opening.

6 – Add a bit of honey or enjoy the simple mint flavor on its own.

Mint and honey are both said to be great for digestion. Mint is also great for a refreshing jolt, and this drink is especially great on a hot day.

This entry was posted in food sources, recipes. Bookmark the permalink.

2 Responses to Mint and honey iced tea

  1. Jag gillar naturen som den ar says:

    Hot teas in season at autonomy institutes tea room bunker: Clover, Mullein, Pine tops, Yarrow, Rasberry Leaf, Lemon Balm (cultivated), Sassafras.

    Coffee substitutes available in the institutes breakfast cafeteria adjacent to the tea room bunker: Sunflower (cultivated), Dandelion, Chufa

  2. jennbecluv says:

    I can’t imagine giving up black tea (that’s my caffeine source). You’re a braver soul than me, Trace. I do enjoy using lemon balm in tea though so if you can find some, add that to your mint mix for some citrus zing. Rather curious about this holly possibility. Do tell if you give it a try.

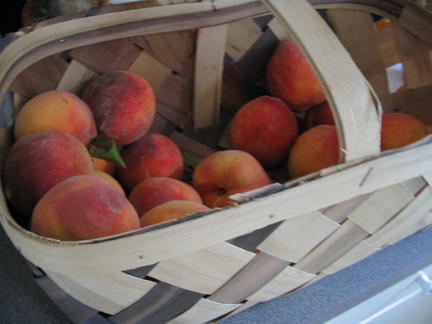
Peach Basket

roadside peaches part two the canning

Roadside peaches part two – The Canning

Peach Basket

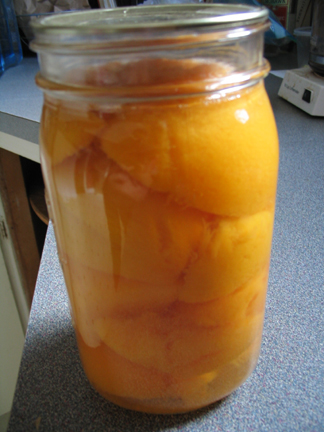
For the quarts of peach halves –

1 – You can use a “syrup” to can whole or half fruits or you can simply use water. Sugar has no preserving qualities and is used mainly for taste. I decided to use a very light honey syrup. To 5 cups of water add 1 ½ cups of honey. Heat to simmering.

2 – Wash peaches while you boil a bit of water in a sauce pan, enough water to cover a half peach. Reduce water to a simmer after it boils.

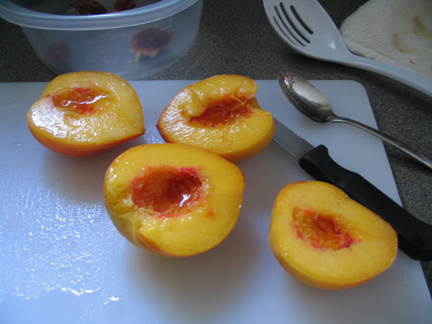
3 – Cut peaches in half, remove pit and any pit pieces. Dunk the peach halves in the hot water for a few seconds. Skins will come right off after they cool for a few more seconds.

Peaches cut in half

4 – Place the peach halves in the honey water mixture. Simmer for a few minutes.

5 – Hopefully you have started your canner water to boil and washed your jars. If you haven’t, now is the time. Simmer the jar lids and rings, then cover and set aside. Scald the quart jars in the boiling canner water.

6 – Taking the peaches right out of the simmering syrup, pack the halves in the quart jars as tightly as possible.

7 – Using a ladle or large spoon, fill the jar with the honey syrup to ½” of the jar top.

8 – Using a plastic spoon handle or chopstick, try to remove as many air bubbles as possible from the jar. Shove the utensil down the sides of the jar to remove the bubbles.

9 – Remove a ring and lid from the hot water and tighten on the jar.

10 – Place in the boiling water canner and process for 25 minutes, 20 minutes for pints.

11 – Remove the jars and let cool overnight. In the morning, check the seals, remove the rings, label and store in a cool dark place.

Peach Halves

12 – Use the excess honey syrup to make peach honey vinegar.

For the peach sauce –

1 – Repeat steps 2 and 3 above. Also, get your canner water ready and wash up a bunch of pint and half pint jars. Simmer the lids and rings then cover and set aside.

2 – Add the peach halves to a large stock pot. Smash with a potato masher of whatever you have in order to get the peaches into small chunks. Heat to simmering.

3 – Add honey and cinnamon (if you have it) to taste. Neither of these things is necessary; they are merely for taste when the jars are opened for use.

4 – Heat the mixture to boiling, being careful not to burn it.

5 – Scald the jars then fill to ¼” of the jar top with the peach mixture.

6 – Remove jars and lids from the hot water and tighten on the jars.

7 – Process for 15 minutes in the boiling water canner.

8 – Remove the jars and let cool overnight. In the morning, check the seals, remove the rings, label and store in a cool dark place.

I use fruit sauces instead of jams for a few reasons. First, they don’t take as long to make. Cooking a peach jam without pectin would take several hours. Second, I use the sauces with my rice breakfasts for a little something in addition to the honey.

This entry was posted in recipes. Bookmark the permalink.

Comments are closed.

basic rice pudding

Basic rice pudding

The rice and honey breakfast is great, but I’m finding that there isn’t always enough time to cook rice before work in the morning. With a 30 minute bicycle commute to factor in, 15 minutes of waiting for rice is a bit much. So here is my recipe for a very basic rice pudding that can be eaten cold over the course of several mornings.

1 – In a saucepan add ½ cup rice to 1 cup of water. Bring to a boil, reduce heat to low and cover. Cook for 15 to 20 minutes or until all liquid is absorbed by the rice.

2 – Preheat oven to 325.

3 – In a glass baking dish, add 2 eggs, 2 ½ cups of the milk of your choice (I used some oat milk from The Stash, but goat milk will be next), ½ cup of honey (sugar if you have it or prefer it), and ¼ tsp salt (if you have it). You can also add vanilla and cinnamon, but 100 milers will have a hard time finding those items. Check your Stash as needed.

4 – Add the hot rice into the baking dish and mix thoroughly.

5 – Bake uncovered for 45 minutes, stirring every 15 minutes. The baking time might be more or less depending on what kind of milk you end up using.

6 – Remove from the oven and cool on a counter or put the dish in the fridge overnight.

7 – Enjoy for breakfast with some toast or eat it warm for dessert.

Adapted from online and book recipes; distilled to the primary 100 mile ingredients.

I used a quarter cup of Carolina Gold and a quarter cup of Forbidden Black in my first attempt at rice pudding. The result was, of course, black, but nonetheless tasty. As the song says, “use what ya got.”

This entry was posted in recipes. Bookmark the permalink.

Comments are closed.

ginger scrap kimchi

Ginger scrap kimchi

In an effort to incorporate more “waste” into my diet, I find myself scrutinizing the scraps, trimmings and ugly produce that I throw in the compost bucket at work. Some of the items are still good on some level, with enough trimming and patience, like a shriveled piece of ginger with moldy tips or a piece of daikon in similar disarray. These two produce bits passed from my hands to the compost bucket today. I salvaged them a few minutes later, mainly because I wanted to try to make kimchi, a spicy fermentation using ginger, radish, hot peppers, onions and garlic.

The radish and ginger are two items currently out of the 100 mile range, the ginger being something that I may only find as scraps and never locally grown except by a hobbyist. So I grabbed several little pieces, stuck them in my backpack and brought them home.

In addition to saving the ginger and daikon, I bought a small cabbage (45 miles), brought it home and added it to a couple carrots from a bag that Gary – my Albert’s Organics representative – gave me out of his weekly food box, a few heads of elephant garlic (45 miles), leeks (45 miles) and jalapeno peppers (35 miles) that I already had at the house.

The process of making kimchi seems pretty straight forward, a bit like sauerkraut, but without the wait. This recipe is adapted from Wild Fermentation.

1 – Make a strong brine using 4 cups filtered water and 4 tablespoons of salt. Dissolve the salt fully in the water.

2 – Chop carrots, cabbage and radish/daikon into the brine.

3 – Weight down the vegetables with a plate to keep everything submerged in the brine.

4 – Leave the mixture for a few hours as the vegetables soften up.

5 – Make a mixture of a finger of grated ginger, a few cloves of chopped garlic, a couple hot peppers with seeds, and an onion or several small leeks. Mix and smash the ingredients, bringing out the juices.

6 – Drain the brined vegetables, saving the brine in another container. If the veggies taste gaggingly salty, give them a quick rinse with fresh water.

7 – Mix the spicy paste into the vegetables.

8 – Pack everything into a wide mouth quart jar, packing until brine comes above the top of the mixture. If the level of brine isn’t high enough to cover everything, add some of the saved brine.

9 – Insert a smaller jar into the mouth of the quart jar and press down until brine rises above mixture. Hold down with rubber bands.

10 – Cover with a cloth and rubber band the cloth to the jar. Set aside in a warm place to ferment.

11 – Check the kimchi every day. After about a week, move the kimchi to the fridge to slow fermentation and enjoy.

This entry was posted in fermentation, food preservation, recipes. Bookmark the permalink.

One Response to Ginger scrap kimchi

  1. annie says:

    This was absolutely absorbing reading – I had just been reading in a magazine last night about attempts across the country to live only on what one can grow or get close to home. Frankly, there is much more creativity in the way you cook than in buying 600 ingredients to make something fancy. Consider me an admirer and someone inspired to try to “grow my own” to the extent I can do so on a small, urban lot, and to think about the origins of the things I have to purchase.

potato scallion pancakes

Potato scallion pancakes

These are the days when potatoes are in season and abundant. We’ve been eating pounds of yukons and red potatoes each week, and I’ve been trying to figure out some other ways to eat them besides the standards – mashed, fried and baked.

I consulted one of the many cookbooks on our shelf, Betty Crocker’s New Cookbook, published in 1996. (Betty is a “warm and friendly” name, yes?) This book was a gift from my Mom upon my graduation from college, and it was fairly well worn during its first few years in my possession. I have old stars written next to things like fajitas, spanish rice, banana muffins and cream of broccoli soup. Now it is mostly a reference book, although I still use the soup stock recipes.

I turned to the index, searching for a new idea for potatoes when I saw a previously unused recipe – potato pancakes. Checking the ingredients list for availability in the house was pretty easy – potatoes (45 miles), eggs (7 miles), salt (the stash), flour (some expired gluten free flour from the store). I added some scallions (19 miles) and some garlic (45 miles) to the easy recipe and went to work.

1 – Clean, then boil 4 medium potatoes for about 10 minutes. Cool them off in the freezer while getting the rest of the ingredients ready. If you don’t have a freezer, just set them on the counter until they are cool enough to handle.

2 – Finely chop 4 or 5 scallions and 2 cloves of garlic.

3 – Add the scallions and garlic to a bowl with 1/4 cup of flour, 1 tsp salt, and 4 eggs. Don’t have flour or salt? No problem; skip it. We’re minimalists here anyway.

4 – Shred the cooled off potatoes into the bowl then mix everything well.

5 – Heat some oil, butter, bacon grease, or whatever is handy in a frying pan. If you don’t have anything to grease the pan, just watch the cakes extra carefully as the eggs provide the grease, and be very careful not to burn the bottoms.

6 – Scoop out a bit of the batter and form pancakes. Fry both sides until they are nice and browned. A few minutes on each side seems to work fine.

7 – Pile on a plate and eat!

While the basic recipe is from the Betty Crocker cookbook, I have embellished it with additional ingredients and instructions. Enjoy.

I’m finding that cooking without various ingredients is a liberating experience and not a reason to stress. The new rule is to taste often. And as The Stash begins to dwindle, I have to wonder on the importance of certain ingredients. More on that later…

This entry was posted in recipes. Bookmark the permalink.

2 Responses to Potato scallion pancakes

  1. Laurie says:

    Wow, I’m seriously impressed with your blog. I think of Wilmington as home territory, since I’m originally from the southeastern tip of Robeson County. We go to Lake Waccamaw a lot and it’s good to read about sustainable foodies in that area, since I don’t know much about that end of things down there.

  2. Pingback: Potato scallion pancakes

Canning supplies and equipment

preserving knowledge

Preserving knowledge

I opened my first jar of homemade vinegar dill pickles, one of the quarts I put up a few weeks ago from the Black River Organic Farm cucumbers. The first pickle out of the jar was nice and crisp, if only a bit wobbly, probably due to the fact that I didn’t bother to put Pickle Crisp in the recipe. I really don’t care about the aesthetics right now, as long as the pickles came out okay and don’t kill me.

I made two different batches, one with regular white vinegar and the other with apple cider vinegar. The apple cider vinegar pickles might be an acquired taste just like the vinegar itself. They are a little tangier and have more of a vinegar aftertaste unlike the white vinegar pickles. Again, I don’t mind as long as they don’t kill me.

Kristin and I have had canning paraphernalia around our various houses for the past three or four years, purchased under the assumption that each summer was going to be the summer where we preserved a bunch of food. We have the regular hot water bath canner as well as a pressure canner. On top of the kitchen cupboards are boxes of various sized jars, picked up from Big Lots, yard sales and some area thrift stores.
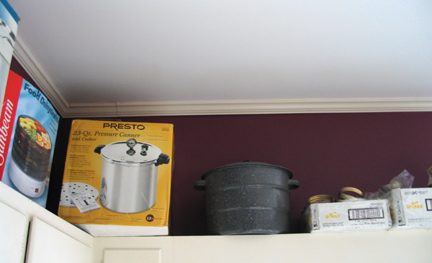
Canning supplies and equipment

Kristin and I went to a Saturday morning canning workshop quite a few years ago and made pickled pears. We learned the process and theory behind canning with both boiling water and pressure. It seemed simple enough, although someone was holding our hands throughout. We came home and said that we would get right on it and start canning our own stuff. And then we didn’t, and the years went by.

The 100 mile diet project got me back in the mindset of preserving food by canning. This time there wouldn’t be excuses because I was going to need local food when local food wasn’t growing. I dove in on the pickles and basically spent a day teaching myself how to go through the process.

It was brutal. The second guessing was rampant; I had no idea if what I was doing was correct. I was using a recipe given to me by John and Belle Shisko, an older couple who sell various produce items like chestnuts, kale and figs to the co-op. I didn’t know if the proportions were right with the vinegar, if I needed sugar or not, how long to process, and on and on. The recipe and my source book Putting Food By had different methods than all the Internet sources I found. I decided just to stick with the recipe. The Shiskos are in their 90s, so the recipe couldn’t be too detrimental to my health.

The funny thing about all this is that both of my parents can food every year, or at least used to. My mom works primarily with jams and my dad does spaghetti sauce from his garden tomatoes. Yet neither of my folks thought to teach me this basic process, and I never thought to ask them to teach me. I seemed content to watch or walk in and out on the process. Now when I need the knowledge, I have to plow through a book instead of relying on passed on skills.

It seems this way with a great many things, things our parents or other family members knew how to do with some competency or even with great skill, yet these things are not passed on to a willing, able, and many times enthusiastic next generation. My grandfather was an amazing welder, practically inventing aluminum welding during World War Two. But I don’t know how to weld, never even held a welding stick during countless visits to his shop as a kid and as a young adult. The offer was never made, the desire on my part never expressed, and the fault of dropped knowledge was spread among all those involved.

It has been my intentionand practice for quite sometime to teach and pass on as much of the information and skills I have to anyone who will read or listen or follow along. It is also my intention to never let an opportunity for learning, for adventure, for submerging in tangible skill building exercises in everything from identifying wild edibles to fixing a lawnmower, pass me by. I encourage skill sharing among other folks I know, engage in mutual aid whenever possible and spread the DIY ethic in my daily life. In whatever we are dealing with, more community and more cooperation and more learning from others is never a bad thing.

Anyway, back to the pickles…

Recipe for Kosher Dill Pickles (Warning, the salt and vinegar may or may not be found locally produced. I had a bunch in the stockpiles.) –

1 – Wash jars; heat lids and rings in water not quite to boiling and leave in hot water until needed. Add water to canner (a little more than half full if using quarts, more for pints because they displace less water when added to the canner) and begin to heat.

2 – Boil the following ingredients, then set aside. This is enough to fill approximately 7 quart sized canning jars.

9 cups water

3 cups white vinegar or apple cider vinegar

1/4 cup Kosher salt

3 – In each canning jar place the following ingredients.

4 slices of garlic, two on bottom two on top

2 sprigs dill

optional – 4 peppercorns

cucumbers, whole or sliced lengthwise or rounds

4 – Place filled, tightly closed jars into warm/hot water in canner. Water should be several inches above the lids of the jars.

5 – Cover the canner and bring water to a boil.

6 – Reduce heat to medium and boil for 9 minutes being careful to keep the water between 180 and 185 degrees.

7 – Remove the jars and set aside to cool overnight. Test the seals by making sure they aren’t popped up and remove the rings so they do not rust. Store pickles in a cool place.

Recipe from John and Belle Shisko with canning embellishments by me.
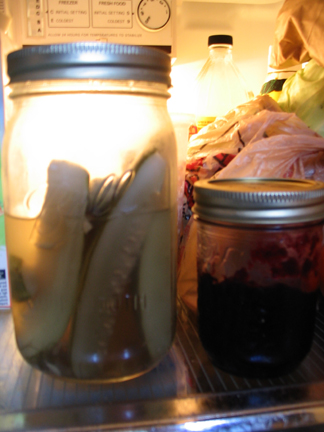
Pickles in fridge

The real test of the pickles was taking a quart to dinner at a friends house. Everyone ate at least two, and I considered that a success. Now on the next project…sauerkraut.
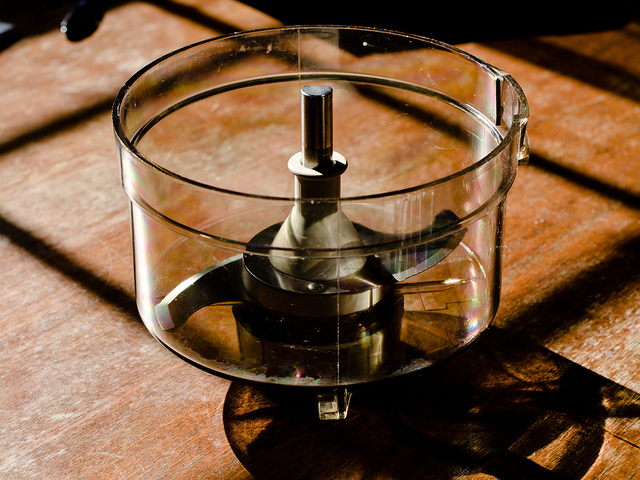
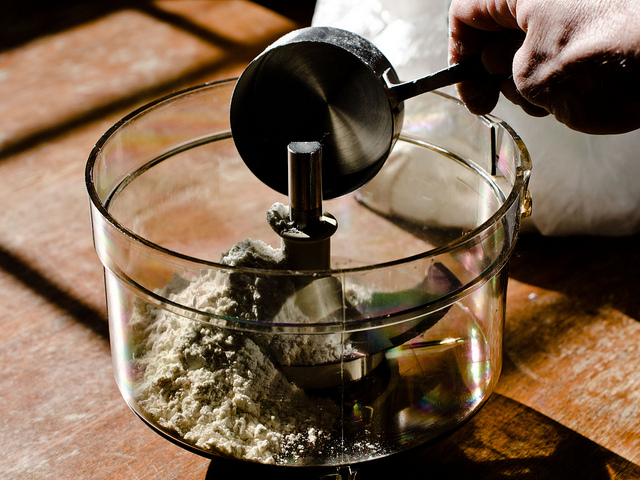
This entry was posted in food preservation, food sources, recipes. Bookmark the permalink.

3 Responses to Preserving knowledge

  1. marye says:

    it was fun reading..I can often and I had forgotten how daunting it can be at first!

  2. Alis says:

    I wonder sometimes if one day no one will remember how to do certain things. Books might help, but they are no substitute for hands on training with some master of a craft. I only wish I could learn from my mom the details & tricks to quilting that she knows…. alas things like work & life get in the way. Why is it in a day of some many conveniences that no one has much time? Glad you are do this. Its inspiring.
  3. jennbecluv says:

    Hey Trace! Love what you’ve been doing lately. I’d eat your preserves! :) I made sweet and hot curried squash pickles last week – if you like fire in your mouth, grab the recipe off my blog and give them a go. Did you ever try making the beet sugar then? Just curious.

Gazpacho

summer garden gazpacho

Summer garden gazpacho

Two weeks ago while visiting Noel and Danielle at Black River, I picked up a forty pound box of #2 cucumbers that were going to be composted. According to the North Carolina Cucumber Outline, the grades for cucumbers –

…are U.S. Fancy, U.S. Extra 1, U.S. 1, U.S. 1 Small, U.S. 1 Large, U.S. 2. Cucumbers are graded on their color, size, form, diameter and defects.”

US #2 are the least desirable because they are off color, have bends, nick, scratches, rough spots, etc. The cucumbers in the box looked fine to me – I’m not about to pass up free local food, #2 or not.

After making 14 quarts and 7 pints of dill pickles, I still had about 20 pounds left. I gave 10 pounds away, which left me with enough for another project. So yesterday I made some gazpacho.

Digging around in the fridge, I found most of the necessary ingredients for the cold soup. I took a can of tomatoes from the cases on top of the cupboards, a handful of cherry tomatoes from the co-op garden (5 miles), a big cucumber (45 miles), an on-its-way-out green pepper (45 miles), some scallions from Linda Kerr in Rocky Point, NC (19 miles), some elephant garlic from John and Belle Shisko in Holly Ridge, NC (34 miles), some basil from the yard, and some other seasonings from the bottomless seasoning cupboard.

Here is how to make a very simple summer gazpacho –

1 – Puree a can of tomatoes (or 6 fresh slicers) and 3 cloves of garlic together in a blender or other mixer.

2 – Add chopped bell pepper (any color and size that you have), a half cup of chopped scallions or any other onion, a chopped cucumber (remove the seeds if you want), 1/3 cup of basil, 1/4 oil (whatever you have – if you don’t have oil, skip it), 2 tsp salt and some pepper to taste.

3 – Use the “pulse” on the blender to reduce the chunks a bit.

4 – Empty into another container and refrigerate for a day to let the flavors blend.

5 – Serve cold with bread or crackers. Many people like this soup with cheese, so sprinkle some cheese if you have some. I used some Nature’s Way (29 miles) goat mozzarella with mine.

Gazpacho

This entry was posted in recipes. Bookmark the permalink.

One Response to Summer garden gazpacho

  1. I love gazpacho! Perfect for the summer weather!

    Welcome to The Foodie Blogroll! I love your blog!

Shopping Basket